Posted on Leave a comment

Book Writing Tips: 11 Questions to Ask to Write Better Scenes

Woman's hand holding post-it note above document she is editing. Book writing tips to use in a developmental edit.
Photo by Ron Lach, Pexels.

Many writers ask: “Why go through a round of developmental editing?” It can be confusing and unclear to truly understand what a developmental book editor does and how they can provide book writing tips to improve your book. One example is that a developmental editor can help you draft stronger, more impactful scenes. They may not provide feedback on every scene, but for the key moments in the book (such as The Ordeal that the protagonist faces at the end of Act 2), having a developmental editor pay close attention to the strength of that scene can enhance the overall story.

Why Focus on Individual Scenes?

Your novel is made up of scenes, the same way a movie is made up of scenes. Characters interacting. Dialogue and action that represent different tensions and the resolution of those tensions. If a novel is heavy on narration – always explaining to the reader what is going on rather than letting them interpret the events for themselves – the reader may get bored. (This is where a developmental edit or finding book writing tips on narration can prove useful by pointing out these instances!) But no matter how much telling versus showing is going on in your scene, there are key questions to ask to help you ensure that each scene is complete and contributes to the plot of your novel as a whole.

11 Questions to Ask to Determine What Is and Isn’t Working in a Scene

1. Who is the Protagonist?

Who or what is the protagonist in this scene? Which character is the one your reader should be focusing on? (In the event that you have several main characters, or that the scene is being shown from a supporting character’s POV, the reader should be clear who is the focus of the scene and whose side they are on.) Focusing on this can help you avoid the dreaded “head-hopping” (switching character POVs midscene). A developmental book editor can help locate any instances of head-hopping that you may have glossed over.

2. Who is the Antagonist?

Who, or what, is the antagonist in this scene? Who or what is taking action to prevent your main character (protagonist) from achieving their ultimate goal? It should be clear in each scene what opposing forces are at play.

3. What does the Protagonist want to do?

The protagonist’s goal in the scene may be separate from their larger goal or a part of it. Let’s say your protagonist’s main goal is to save their sister, who has been kidnapped by the antagonist. Every scene in the plot should contribute toward their (eventual, hopeful) achievement of that goal. But in a scene where the protagonist has to gain information from a side character so they can continue on their journey, the protagonist’s goal in the scene is more precise: It’s not “save Sis!”, it’s “find out X so I can save Sis!” 

So in a particular scene, the protagonist simply wants to talk to the side character to find out what they need to know. Integrating these into every scene can be tricky, so the developmental edit can help you better define the goal in each scene. It’s best to think of the straightforward goal as a producer of several obstacles blocking the protagonist from achieving said goal.

4. What does the Antagonist want to do?

You’ve probably heard several book writing tips stating that in every scene, your protagonist should want something, even if it’s as simple as a glass of water. That may be easy, as your protagonist has a central goal they’re working to achieve throughout the entire plot. However, don’t forget your antagonist. 

If your antagonist only wants to “stop the protagonist!” in every scene, that will become boring and repetitive/predictable for the reader. A well-rounded antagonist should have their own goals and aims throughout the novel, and in each scene, their actions should reflect movement toward that goal, as much as your protagonist’s actions should reflect movement toward their goal.

5. What emotion will the reader experience?

What are you trying to evoke in the reader throughout the scene? What is the protagonist feeling and how will that translate to the reader’s experience of the scene and contribute to their experience of the novel as a whole? If you find yourself stuck on this one, pull from your own experiences to channel the emotion you wish to convey. A developmental book editor can also provide a second set of eyes on if these emotional beats are effective or not. 

Close up white and black king chess pieces.
Once the players and tension in the scene is set, consider how their movements affect the story. Photo by Rain Photography, Pexels.

6. What is the inciting incident for the scene?

It could be something as simple as someone telling the protagonist that X person has the information they need, which sends the protagonist on a visit to X’s house to ask them what they know. Or it could be something as complicated as solving an ancient riddle that triggers an elaborate booby trap protecting the tomb in which the protagonist is standing. Whatever it is, make sure it’s clear to the reader how the character ended up in the situation in which they now find themselves.

7. What is the turning point of the scene?

There are helpful book writing tips for common shifts in pivotal scenes – the protagonist learns something new; someone changes their mind; the door clicks open. Make sure it’s clear to the reader where in the scene the action moves toward the next plot point or emotional moment. A developmental book editor can help smoothen your turning point transitions into the next scene.

8. What is the crisis of the scene?

What is the tensest moment of the scene for the protagonist? The moment when there is no turning back? Often, this is the most heightened emotional moment for your reader as well, but sometimes the most emotional moment comes immediately after the crisis. See if you can identify exactly where in the scene the characters are at their most tense or most strained.

9. What is the climax of the scene?

How does the tension of the scene come to a head? Is there a moment when the tension has been ramped up so much it can’t be turned up any more? Not every scene needs to be a grand climax for the story, but several book writing tips state that having each scene reach a peak ensures its purpose and meaningful transition to the next scene.

10. What is the result/resolution of the scene?

Did the protagonist get what they wanted? Did the antagonist? Did both of them walk away without gaining progress toward their goal, or are they sent in a new direction to find out more? Or was the tension interrupted and neither of them got what they wanted, only motivating them more for the next confrontation?

11. Who "won" the scene?

Sometimes, the protagonist gets what they wanted out of the scene. Sometimes, the antagonist does. Even if the antagonist is a disembodied force — such as “society” or “family pressure” — sometimes, the protagonist will confront something within themselves and wrestle with these disembodied forces, and come up short. (A developmental edit can be useful for properly utilizing these forces.) They may not be able to “defeat” this antagonist yet; they may still be caught up in complications that result in them continuing to struggle against these forces. Sometimes, the antagonist wins so that the protagonist can keep on fighting.

Developmental Editors Provide Book Writing Tips

Eyeglasses and a markup document next to an open laptop.
Photo by Ron Lach, Pexels.

For key scenes throughout the novel, the developmental book editor can provide focused feedback to help you make the most of your revision time and to address these questions and point out where (and maybe how) scenes could be strengthened by addressing some of these questions so the reader has full context and a complete emotional experience every time it matters.

This information was elaborated on from book writing tips provided in a 2026 webinar hosted by Tim Grahl, CEO of Story Grid, titled “Why Draft-First Thinking Keeps Writers Stuck.” Story Grid offers book writing mentorship for writers of all levels. SRD Editing Services editor Cortni Merritt attended the webinar as part of her commitment to ongoing education in developmental editing and book coaching.

Contact SRD Editing Services to Discuss a Developmental Edit for Your Novel

Posted on Leave a comment

How to Procrastinate in Writing (the Right Way): Procrastinate Efficiently to Put More Words on the Page Every Day

Young black woman in pink on pink background; staring in space procrastinating

The best advice for writer’s block is accommodating procrastination in your writing process.

Procrastination. In writing, the word alone likely terrifies you. In person, it can be a writer’s greatest enemy, stunting them from producing their work in a timely manner. It can feel debilitating, paralyzing, sometimes even humiliating. It’s likely you’ve come here to find out how to rid yourself of procrastinating entirely, but what if I told you that procrastination is not something to fear? What if I told you it’s a human response to responsibility and dread, and that you should invite it into your writing process? It’s unavoidable. Procrastination, avoiding your writing, is a challenge faced by every writer, a fact of this field. Solely because it’s a real challenge doesn’t mean it has to be a burden.

Young black woman in pink on pink background; staring in space procrastinating

Question Your Writer’s Block: Procrastination Is Caused By Something Deeper

First, you must ask yourself: Why do you procrastinate? It can be insightful to uncover what is stopping you from writing. Some common reasons to consider are a fear of judgment, that your work isn’t good enough, or that your ideas aren’t fully formed. You may worry others won’t like what you’ve written, that your time will have gone to waste. You may find that you’re not in a place to write yet, that you still require time to conceptualize your story. It’s as important to recognize when procrastination is a signal to take a break or allow yourself time to outline your book.

Spend 10 minutes inquiring why you procrastinate, and as you unearth your reasons… write them down. Yes. It may sound like ridiculous advice for writer’s block, but having a tangible list of reasons provides the full, unfiltered scope of your fears. Write them on a piece of paper, a Google Doc, hell, even a napkin. (I won’t judge!) Whatever is most realistic for you to remember and revisit. 

Once you have your list, read them out loud and challenge each one. Let’s say you have a fear of judgment. Why? Do you worry you’ll lose credibility, or that you’ll find out you’re a terrible writer? This exercise forces you to be vulnerable with yourself. It can feel daunting to look inward and question your feelings, but if you’re up to the challenge, it can reveal your deepest insecurities. You’ll find that your reasons are exactly that: your own insecurities. It’s your inner critic ceasing your writing before hearing anyone else’s opinion. 

I recently listened to Mel Robbin’s Let Them Theory on audiobook, and her advice for this situation would be: Let them. Let them judge you. Let them misjudge you. Let them think you’re a terrible writer. It’s frightening, but by facing the idea, you can then move forward to: Let me

What will you do if people judge or misjudge you? Will you develop yourself, hone your skills, rise to the challenge? Will you decide/choose only to listen to the judgment of people who have done more or better than you? Frankly, will you choose/decide to listen to the people who know what they’re talking about…including yourself. No one else knows what you went through to get where you are, so let them (mis)judge you, and let you grow from that experience.

Curate Your Ideal Writing Space

Now that you’ve introspected and asked yourself why, create your ideal writing environment to help you break past the writer’s block and procrastination: put together a when and where that sets you up for success in your writing. 

Try writing at different times of the day or documenting when your best ideas come to fruition. You may find your brain is surging with plotlines the second you roll out of bed, or that a rush of productivity hits you late at night. When you’ve found your creativity sweet spot, you’ve found your when

Depending on your when, you may find it challenging to designate a block of time for writing. Having a creative burst of energy at work or while cozying up on your couch at home can make it difficult to find palpable motivation to write. Therefore, creating an intentionally inviting where for your writing alleviates some of the difficulty. 

Change your scenery. At work, step out to your car during your lunch break or drive to a local coffee shop. At home, designate a room and put away all distractions. Light a candle, play calming music, brew a coffee or tea. Fill your space with inspiring pictures, quotes, or even a color scheme that gets you in the zone. Anything that effectively eases you into your writing space. The key is to invite yourself into writing. It should feel stress-free, a place you associate with relaxation and creativity. 

Make Room for Procrastination in Writing

Lastly, when blocking out time for your when, allocate time for procrastinating. Yes, you read that correctly. Time-wasting is unavoidable, after all, so invite it into your sacred writing space. Try the following approach, a modification of the Pomodoro technique, and see if this doesn’t help break up some of your writer’s block, procrastination, and anxiety about your craft

Two-Minute Technique to Tackle Writing Time

Give yourself 10 minutes on top of your writing time strictly for procrastinating. So, if you have an hour, 50 minutes is dedicated to writing and 10 minutes to procrastinating. This may feel uncertain the first few times, but with practice, it becomes normal and easier.

dedicate to focused writing time for better writing

Allow yourself 1 procrastination-minute at the start of your writing session to panic, moan at the blank page in front of you, curse and grumble out loud, or whatever you want to do for 1 minute to get out some nervous energy. 

After that minute, when you put your hand on the pen or fingers to the keyboard to start writing, tell yourself you’re only going to write for two minutes before you can take another break. 

You can do anything for two minutes, right? 

Then, set a timer for 10 minutes. And start writing.  

After two minutes, if you really want to take another break, do it. Spend another minute (1 more procrastination-minute) griping and prepping yourself. Then, try again to write for two minutes (but set another 10-minute timer).

What generally happens is that after two minutes, your brain becomes engaged in the activity, and you won’t be ready to take a break. You’ll probably write for the whole 10 minutes, until the timer goes off.

When the timer goes off and you feel like taking a two-minute break, go for it. You’ve built it into your writing time already. But, if the ten-minute timer goes off and you’re in the zone, reset it, and write for another ten minutes. 

You can repeat this process as many times as you want for the length of time you have. Tell yourself you’re only going to write for two minutes, then see how fast ten minutes goes by. 

Limit yourself to two-minute breaks when you do decide to take a break. Blue timer clock; signifies how to time yourself to challenge procrastination

Now, take a deep breath. You’ve prepared the time and space to put off things for a little bit, every now and then, and if it works, then use it. Ultimately, you can see if this approach doesn’t make you more productive overall. 

Tips to Keep Writing When the Urge to Stop Creeps In

Now that you understand your why, have found your when and where, and most importantly, have accepted procrastination as part of your process, you can begin to write. Put words on the page. Allow yourself to be messy. The goal is to get your thoughts and ideas out of your brain and on paper. View your writing space as a place to produce results, not to perfect them. You always have time to make revisions and edits later. 

To maintain your flow and avoid any snares in your writing, leaving a marker where you find yourself stuck allows you to move on and revisit it later. Take it from the journalists, who use the acronym “TK” (to come) to sustain their pace, saving tricky spots for their revision. 

If you come to a detail you haven’t researched, a continuity item to check, or you want to leave yourself a note to revisit later, you can always add placeholder text in square brackets (like this: [text]), which are easy to search and unlikely to show up in your writing otherwise (unless you’re writing a math textbook). 

For example, maybe in a dialogue scene, you don’t know exactly what the characters say to each other, but you know somebody is going to get mad by the end. A placeholder like the following will help you return and revise when the time is right: 

[Character A says something insulting to Character B that causes B to angrily respond, slam his fist on the table, and storm out.]

When your writing time has concluded, find a good stopping point. Hemingway said he stopped when he knew what would happen next (often, midsentence!).

Allow yourself an extra minute if you need to finish up a paragraph or jot down ideas for next time, and welcome the desire for continuation if you find yourself in a groove. Otherwise, following your timeframe builds a healthy habit of writing the entire duration of your time, which will help erode any tendencies to procrastinate in the future, because you’re excited about where you left off and don’t want to avoid writing. 

Conclusion: Final Advice for Writer’s Block and Procrastination

Typewritten letters spell out "The End" after you beat writer's blockIf you are willing to accept and accommodate the fact that all people procrastinate, your fear will diminish over time. Acknowledging its unavoidability is the first step to creating a healthy relationship with procrastination, understanding your why challenges you to combat it, and curating your when and where includes it while building a space for you to thrive. It is also important to grow comfortable with imperfection; allow yourself to simply write. Having that rough draft is the first step to finishing your book, and accepting the mess along the way is equally as important as your revisions. 

Above all, it’s crucial to grant yourself grace. Allowing yourself a day off from writing is not a sign of failure, and in most cases is beneficial to your wellbeing. Only when procrastination in writing becomes a habit should you question it. Inviting procrastination into your writing process is the first step to finally writing that book you’ve always wanted to. 

Conquer procrastination with 1-on-1 book coaching

Posted on Leave a comment

How to Get Published: Literary Journal / Literary Magazine Submissions

Background of yellow wood with brown-haired woman wearing black holding a brown umbrella.

Where can you publish short stories, essays, and poetry?

If you’ve ever wondered about the process of literary journal submissions (aka “literary magazine submissions”), this blog may be able to answer some of your questions about how to get published in these types of periodicals. 

Recently, Authors Publish magazine offered a free talk from writer Shannon Mann titled “How to Increase Your Chance of Literary Magazine Acceptance.” (You can view the entire recording HERE). Listening to Shannon speak reminded me of my own days in graduate school, as a fiction submissions reader for Southeastern Review and of my experience submitting poetry to various online and print publications. (You can check out my published poetry on THIS page). 

I am also fortunate enough to remain friends with some incredible creative writers of short stories, essays, poetry, and more, and witness their successes (and struggles!) with publication in journals and magazines. 

In this blog, I’ve compiled an overview and provided some insight into how to get published in literary magazines and journals. I hope it helps you in your journey! 

How to Get Published Tip #1: Register on Submittable

If you’ve done any literary journal submissions already, you’re likely familiar with Submittable.com, but if you’re new to submitting, you will find this platform both common and useful. For many publications, submitting via this platform is required, for others, it’s optional but may perhaps be more convenient for you. If you have a lot of material you want to publish, you ultimately could have many submissions going in many directions. A central hub for managing and tracking them will be a lifesaver.

How to Get Published Tip #2: Start with Research

There are thousands of publications, publishing every type of writing, and you can spend a lot of time and money throwing your best pieces against the wrong walls, hoping they will stick. 

If there are certain magazines you subscribe to and like their stuff, start there in your search of options for literary magazine submissions. If you’re not sure or if you don’t write the genres that your favorite magazines publish, here are a few places you can look to start keeping a list of potential new homes for your words. Consider subscribing to their newsletters (where available) for frequent and easy updates and information on opportunities as well as tips on how to get published.

  • Writers Digest 
  • Authors Publish  
  • The Sub Club and Publishing … and Other Forms of Insanity newsletters
  • The Chill Subs and Duotrope databases
  • The acknowledgments in books, essays, bios, etc. of writers you admire
  • Social media including hashtags (#MSWL) and Facebook groups such as Calls for Submissions Publication Announcements.

How to Get Published Tip #3: Draft a Plan

The thing about literary journal submissions is that it’s a numbers game. The more submissions you send out, the more likely that one (or a few!) of them will get accepted and your work will be distributed. If you choose only one or two targeted publications to submit to, that’s okay, but expect not to be accepted the first time. 

First, understand that knowing how to get published is only part of the battle; you must understand your true why. Ask yourself, why am I submitting? Is it simply because I want to share my words with the world? In her webinar, Shannon discussed common reasons people submit to literary journals or magazines, including a sense of community, for validation, for prestige, to reach interested readers, and/or to build or support a writing career. If you’re trying to make money, she warns and I can confirm, these types of publications are not the way to go. 

Sure, you might win prizes or get paid some (small) fees for some of your accepted submissions, but literary magazine submissions alone (likely) won’t be enough to allow you to make a living off your writing. And if you’re submitting to publications that charge reading fees, you could pay out more than you make back. So factor that into your plan. (You could, of course, target only those publications that don’t charge a submission fee). 

Black background yellow neon sign "everything is connected"
Combine your materials, your cover letter, and your matchmaking skills into a literary submission package.

When you’re formulating your submission plan, I advise asking yourself the three following questions. Consider your true goals and strategy, and follow your heart when it comes to the answers. 

Consideration #1: What am I submitting?

While reviewing potential publications to submit to, be very clear on which pieces of yours are ready to send out. A couple short stories, a batch of poems, an essay or two that might be ready in a few months. You may want slightly different strategies for each piece, but your literary journal submission process will likely look a little different for each genre. 

First: Determine the genre. The number one place you will look for any publication to clarify how to get published with them is their submission guidelines. Look at what they require or what types of pieces they prefer to publish, and tag your work with descriptive keywords/tags to keep yourself organized. Then, you’re basically matchmaking between what you have and what the magazine is looking for. 

If a publication is looking for flash fiction and you have only nonfiction essays to offer, it’s not a good match. Know what you have, organize it for yourself, and make it easy to find when the time comes; this will give you the best chance possible to match up the right piece with the right publication at the right time. 

Consideration #2: What practical information do I need for submitting?

After you’ve created your short list of pieces to submit and your short list of places to submit, you’re on your way! 

First: Consider the upcoming timelines. You might want to schedule a single day once per month to go over upcoming deadlines and send out your submission packages. If you have a lot to submit, maybe you schedule a few hours every week. But whatever your planned schedule, you’ll be far more efficient if you have one, and far more likely to actually follow through on your literary magazine submissions if you make it a regular item on your to-do list and block off time on your calendar. 

Second: Plan ahead for fees that need to be paid. Don’t wait until the last minute to see if you have the money and find yourself overspending. Incorporate that as part of your plan and make sure to budget and have the card you want to use prepared. 

Third: When it’s submission day/time and you sit down to send off your writing to your publications of choice, pay attention to the submission guidelines for each of them. Every publication will tell you exactly what they want you to include in your submission package and how they want your work submitted. If you can’t follow these basic guidelines, expect to receive rejection letters for every submission. 

Don’t spend time formatting your literary journal submissions or your cover letter in any way other than what the guidelines ask for. If there are no instructions, assume that a common font like Times New Roman or Arial is preferred, and stick with a medium-sized font like 11 or 12. I’d suggest 1.5 or double spacing as well. 

However, if they are specific, follow all instructions. If they ask for no more than a certain number of pages or poems, don’t go over the limit. If they ask for all work to be single-spaced, then format it as such. Etc. 

This may seem tedious or nonsensical to you, but they have their reasons, and if you want to play on their team, you’ll just have to play by their rules. It’s as simple as that. The best advice on how to get published: Follow all submission guidelines to a T.

Consideration #3: What do I say in my cover letter?

Many submissions will have you attach your work to an email or upload it to a platform. Either way, it’s appropriate to include a cover letter that addresses the recipient of your message (email or otherwise), providing some basic information regarding your literary magazine submission.

If the publication has a masthead and/or you can identify the name of the submissions reader at the publication, address them specifically. Remain professional, not overly personal, but addressing your message to the specific person is more welcoming and warm than “To whom it may concern.” 

Keep the letter short and sweet. It’s appropriate to open with something you like/admire about the editor’s work in particular or the publication’s work, such as an example of a story they published that you enjoyed, etc. This can help establish a personal connection. 

Include any information asked for in the submission guidelines, and tell the editor you hope they enjoy the attached [insert work here] (five poems, two essays, partridge in a pear tree, etc.).

Special Note!: Simultaneous Submissions

Always pay attention to whether the publication allows concurrent/simultaneous submissions. Many publications will ask you to let them know if you are submitting the same piece simultaneously to multiple places. You may need to include a line about whether any of the pieces included in this literary journal submission package are being simultaneously/concurrently submitted to other publications. If asked to include this information, be sure it’s in there. 

If the submission guidelines ask for an author bio, give them what they ask for. Usually, an author bio is expected to be between 50 and 100 words, written in third-person, and include info such as where your writing has been featured befor, or if you’re a debut/new/emerging writer who is excited to publish their first piece. Use a little humor and showcase your personality here.

How to Get Published Tip #4: Expect Rejections

It’s reasonable to expect that between 0% and 20% of your literary magazine submissions will get accepted. If you’re really good, your stats might be above that, but even professional writers know that not every piece is right for every publication at every time. Maybe your beautiful poem about your mother’s death happens to get submitted a month after they published another poem on the same theme by a different poet, and they don’t want to publish the same type of material in back-to-back issues. So it goes. Timing is out of your hands. Rejections happen for any number of reasons other than just “my work sucks,” so it’s time to get ready to grow some thick skin. 

Related blog: How to Face Rejection as a Writer: https://srdeditingservices.com/how-to-face-rejection-writer/

Consider: What is a Successful Submission?

Now, one interesting thing that Shannon discussed is that a custom rejection letter is a successful submission. Why? Because editors don’t write custom rejections for everyone. They have standard form letters/templates that are sent to most people. But, if you receive something that seems like the editor genuinely liked your piece, or it contains a personal detail that is outside the realm of a form letter, then make note of that in your submission records/notes. You should try that publication again later, with a different piece. Because there’s a chance that editor will remember you, and there’s a chance that your next piece might be more along the lines of what they’re looking for.

How to Get Published Tip #5: Execute Your Plan, Track Your Data, & Adjust Your Approach

Of course, you will not see results from a plan you do not execute. Once you’ve laid out your strategy for a literary journal submission process, you must follow through. Those dates you marked off on your calendar, reserved for sending your materials out in the world? You must sit at your computer on those days, follow the guidelines, and put the plan into action. Send your writing into the world. 

After some time – typically a few days to as long as a year – you will begin hearing back from the publications where you submitted. (Even if you haven’t heard back when your next scheduled submission date comes around, proceed with the plan!) You’ll need to keep track of which pieces were accepted (hooray!) and which were rejected, which means they can now be submitted elsewhere. So now it’s time to choose a new potential home for them and put them back in the submission queue! 

After a few rounds of literary journal submissions, you’ll begin getting the hang of the process and know a bit better what to expect. As you learn more about how to get published in your genres or in your dream publications, make adjustments to your approach. Workshop the materials more if need be, and always update and customize your cover letter. There is no one-size-fits-all solution, so making tweaks to suit your personal style and goals is the only way to reach those goals and fulfill your why

Consult with SRD Editing Services for Literary Journal Submissions

Posted on Leave a comment

What Does Book Proofreading Include?

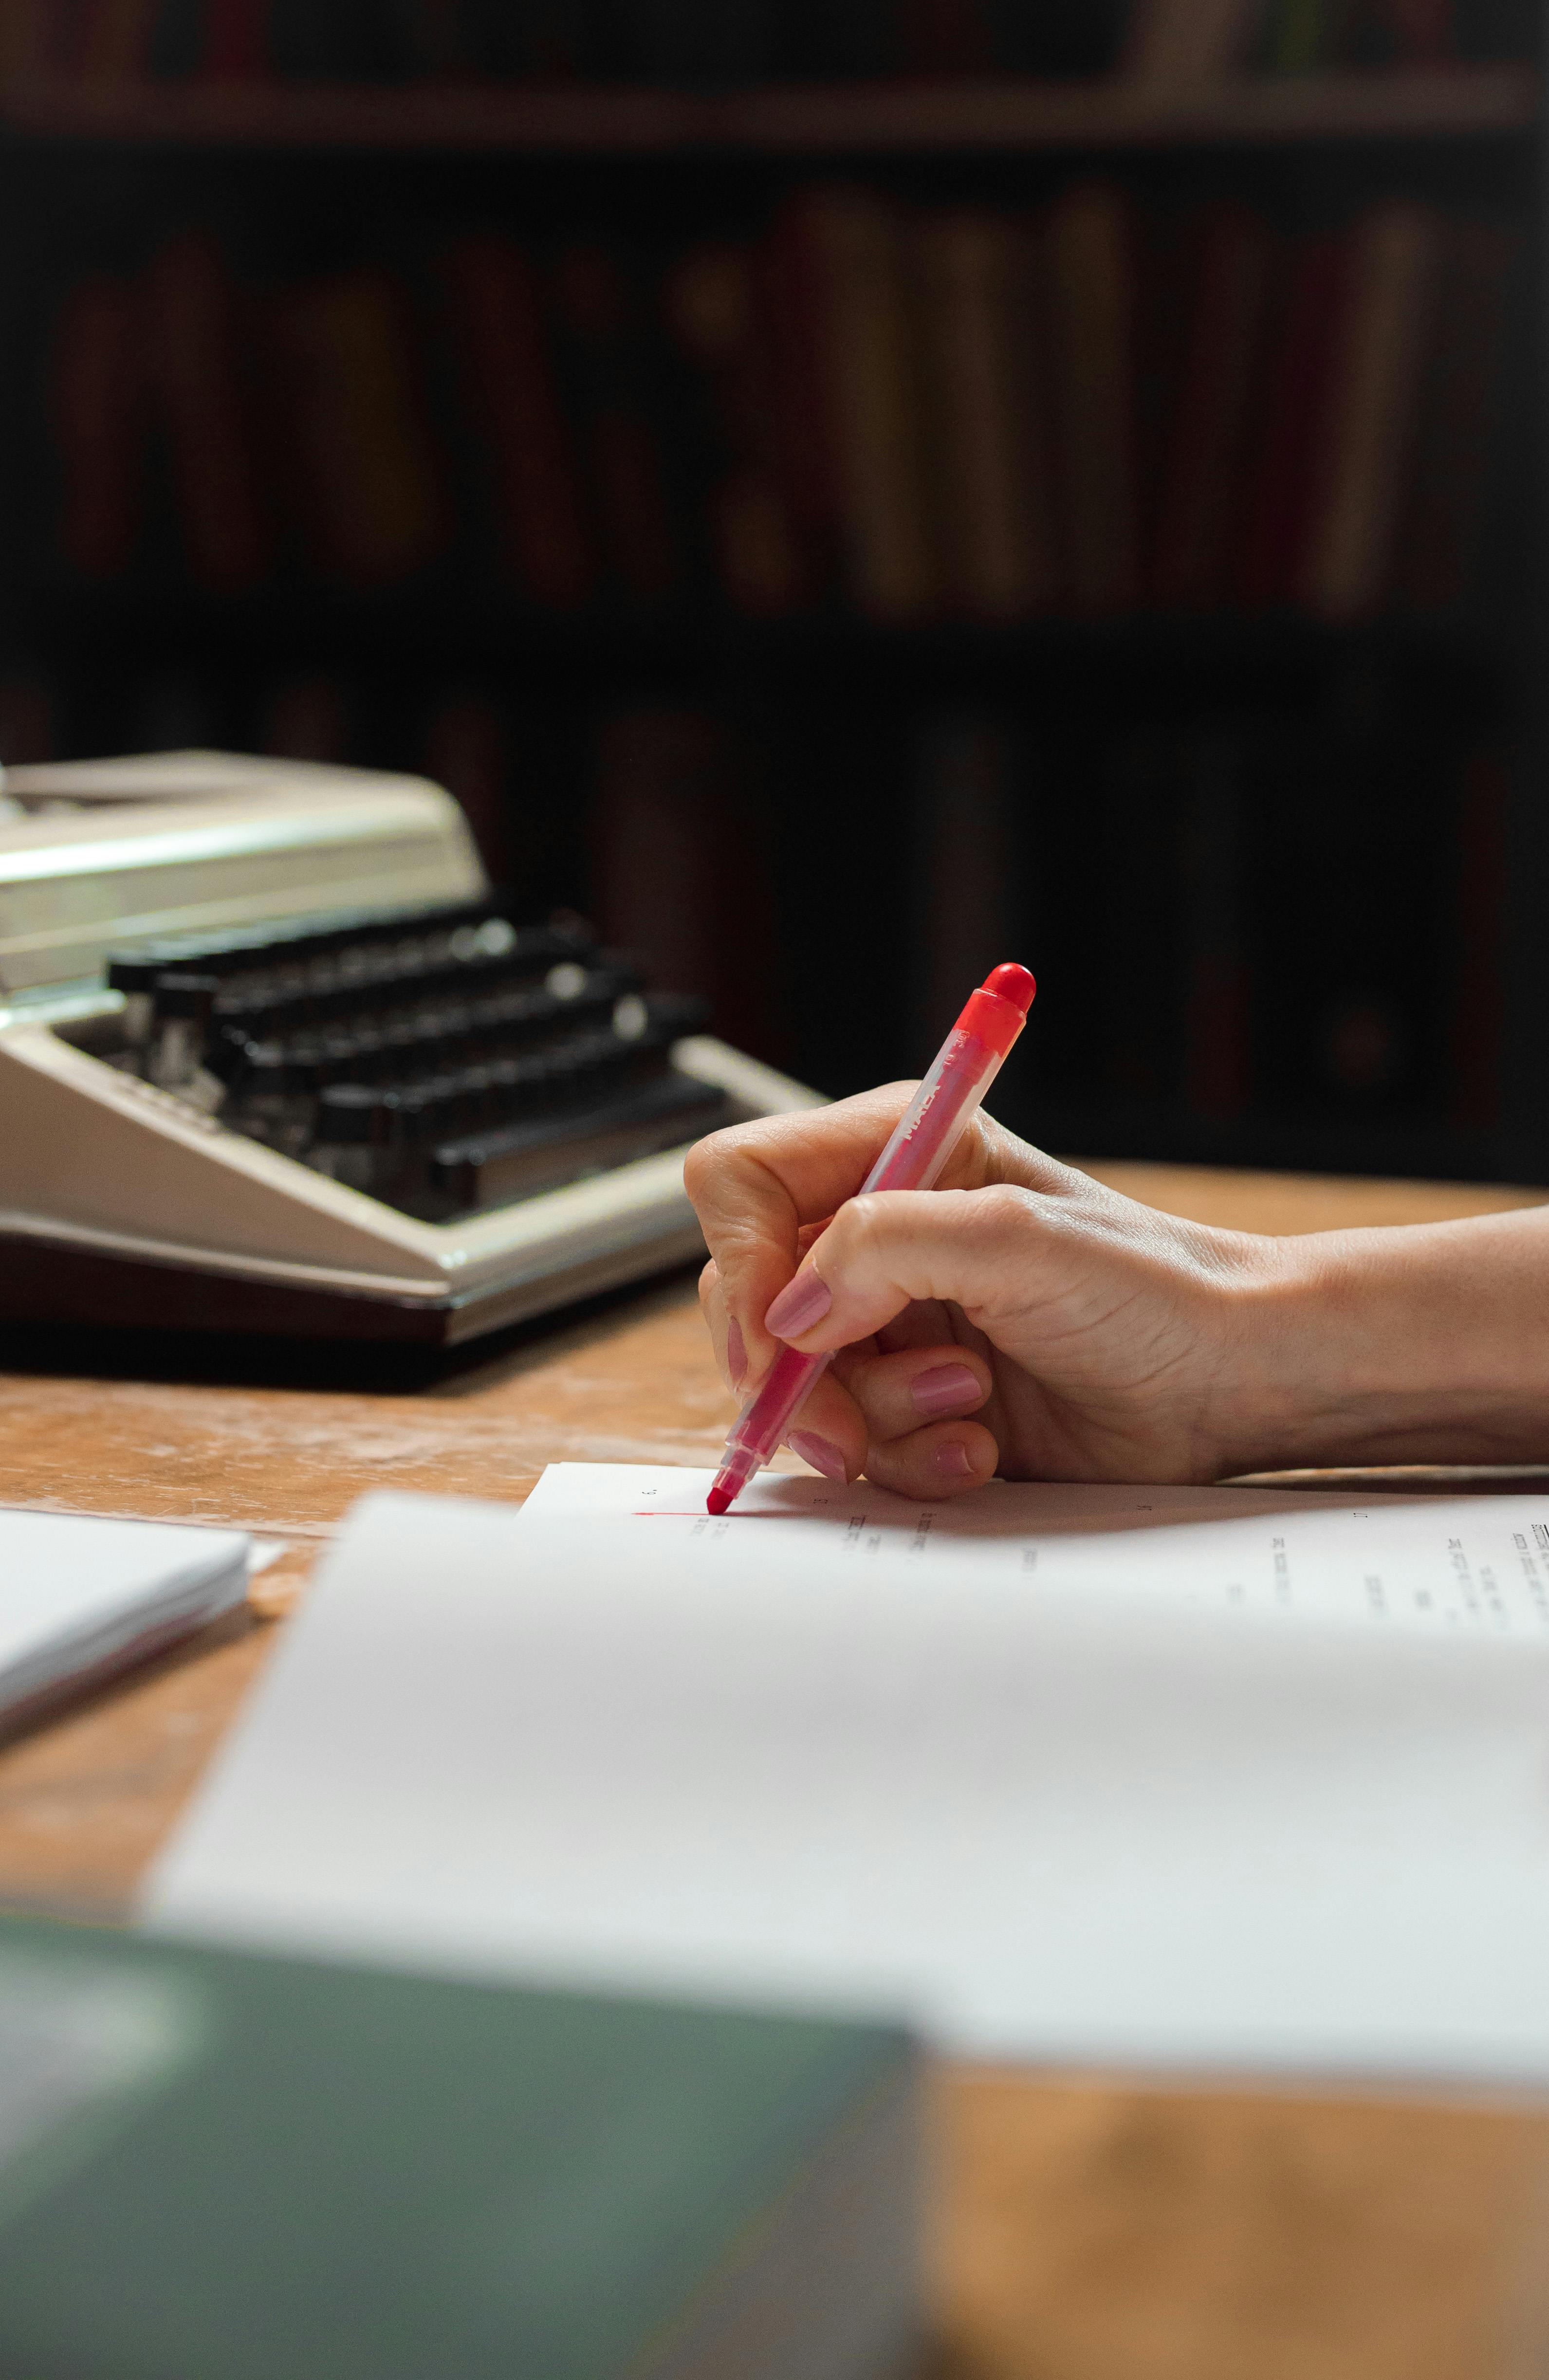
Hand holding red pen for book proofreading with typewriter in the background.

What Does Book Proofreading Include?

While many people mistakenly believe all stages of book editing are the same as book “proofreading,” there is most definitely a difference. 

Not sure if your manuscript is ready for a proofread? Asking yourself, “How do I find someone to proofread my book?” Read on for answers!

Traditional Publishing Sets the Standard for Book Proofreading

In traditional publishing, most stages of book editing are done in a word-processing program. As you might suspect, Microsoft Word is the industry standard for document editing. Even if you write your manuscript in Google Docs, Apple Pages, or another word processor with some text enhancement features, expect your editor to convert your manuscript into a Word document to access the fullest range and best editing features available on the market. 

Don’t worry too much about formatting and layout in this software. There are a few things that should be done to make the overall editing process smoother, but don’t get stressed out about making your Word document look like your vision for the final product. For all its wonderful aspects, MS Word is not the best program for finalizing your book manuscript. 

Once all the stages of book editing are complete – which, in traditional publishing, is typically four rounds of edits (developmental, content, line, and copy editing) – a designer at the publisher will use software like Adobe InDesign to convert your manuscript into a “galley proof.” 

This is when your document begins to “look like” a book! The designer prepares your manuscript by adding things like the correct spacing between lines, drop caps at the beginnings of chapters, fancy or final fonts, images with captions, page numbers, headers and footers with your name, the chapter title or book title, and other design elements. At this point, you’ll no longer be working with an MS Word document; your galley proof will have been converted into a PDF file. 

Now, because all these formatting and design elements have been added to the galley proof, it is more difficult to edit and make large-scale changes to it. PDFs are more complex files that hold more information, and making changes to them can require more steps. Once your galley proof has been designed, you are truly ready for book proofreading.

So What Is Involved in Book “Proofreading”?

Different steps in the stages of book editing focus on different concerns. True book proofreading involves a very light touch, where the proofreader focuses on correcting only “true errors.” Your proofreader will review your galley proof PDF and mark up or make specific changes to typos, spacing errors, and style elements. For example, your proofreader might correct capitalization or apply or remove italics where appropriate. Hopefully, your editor has caught most of these, but sometimes during the process of converting your file from a Word document to a PDF, elements get missed or mistakes happen.

Keep in mind, your proofreader is not reading for ideas or content. They are not fact-checking or confirming spellings of names of public figures or other Google-able information. They are not going to give you feedback on character development or plot holes. They, honestly, are not really paying attention to the same things your editor should have paid attention to. They are focused on finding those true errors that your editor may have missed or that could have even been introduced at some point during the editing or file conversion process. They are focused on checking the consistency of design elements and making sure everything “looks right” in addition to the text being as error-free as possible.

Why Is Book Proofreading Important?

Your proofreader is the last set of eyes to go through your manuscript before it goes to the printer. Hopefully, your proofreader finds an error only about once every 1,000 words (or even less often!). By the time the PDF gets to them, it should be mostly clean and polished. Mostly finalized. So close to done that it only needs one more read-through, and that read should catch so few errors that it takes only a few minutes to finalize once they return it to the graphic designer. Then, your approved galley proof goes off to the printer!  

It’s important to understand this process because when you ask someone “Can you proofread my book?,” you’re asking them to pay attention to the smallest details, not the big-picture issues, and you’re trusting them to have a razor-sharp eye to prevent even the smallest error from making its way into the published version. 

Of course, people make mistakes! No one is perfect. And having multiple professionals involved in the various stages of book editing helps to catch as many errors and address as many concerns as possible. Even traditionally published books that have gone through so many rounds of editing and proofreading might still contain errors when they are released to the market. So give a little grace and have a little patience. Proofreaders are doing their best to help make your book as perfect as it can be, but they might miss one or two things if your book is particularly long or dense, or if on a tight deadline.

What Should I Be Aware of When Hiring a Pro to Proofread My Book?

While this blog has discussed the standards found in traditional publishing houses, self-published authors can follow the same process. Some editing might be combined into a single step in the stages of book editing—such as having the same editor perform both content and line edits—but each book should have separate steps for editing and proofreading.

The lesson here is that, as an educated author, you should be aware of the differences between the stages of book editing, including book proofreading. Don’t confuse the two! Of course, there are similarities, and experienced editors can be excellent proofreaders (and vice versa), but don’t tell your editor that your manuscript “only needs a proofread,” unless you’re convinced that it’s so clean and error-free that it’s ready to be put into PDF format. If there are no more changes to make – other than adjusting for true errors – you’re likely ready for a true proofread. Ask a professional for a sample edit or proofread of up to five pages to allow them to determine which type of service your manuscript needs. Once they have evaluated that you’re really ready for a proofread, get excited, because it means that your book’s launch date is just around the corner!

Ready to discuss your book proofreading?

See Related Blog Articles...

Posted on Leave a comment

Excellent Experience at the Read It Write It! Book Festival

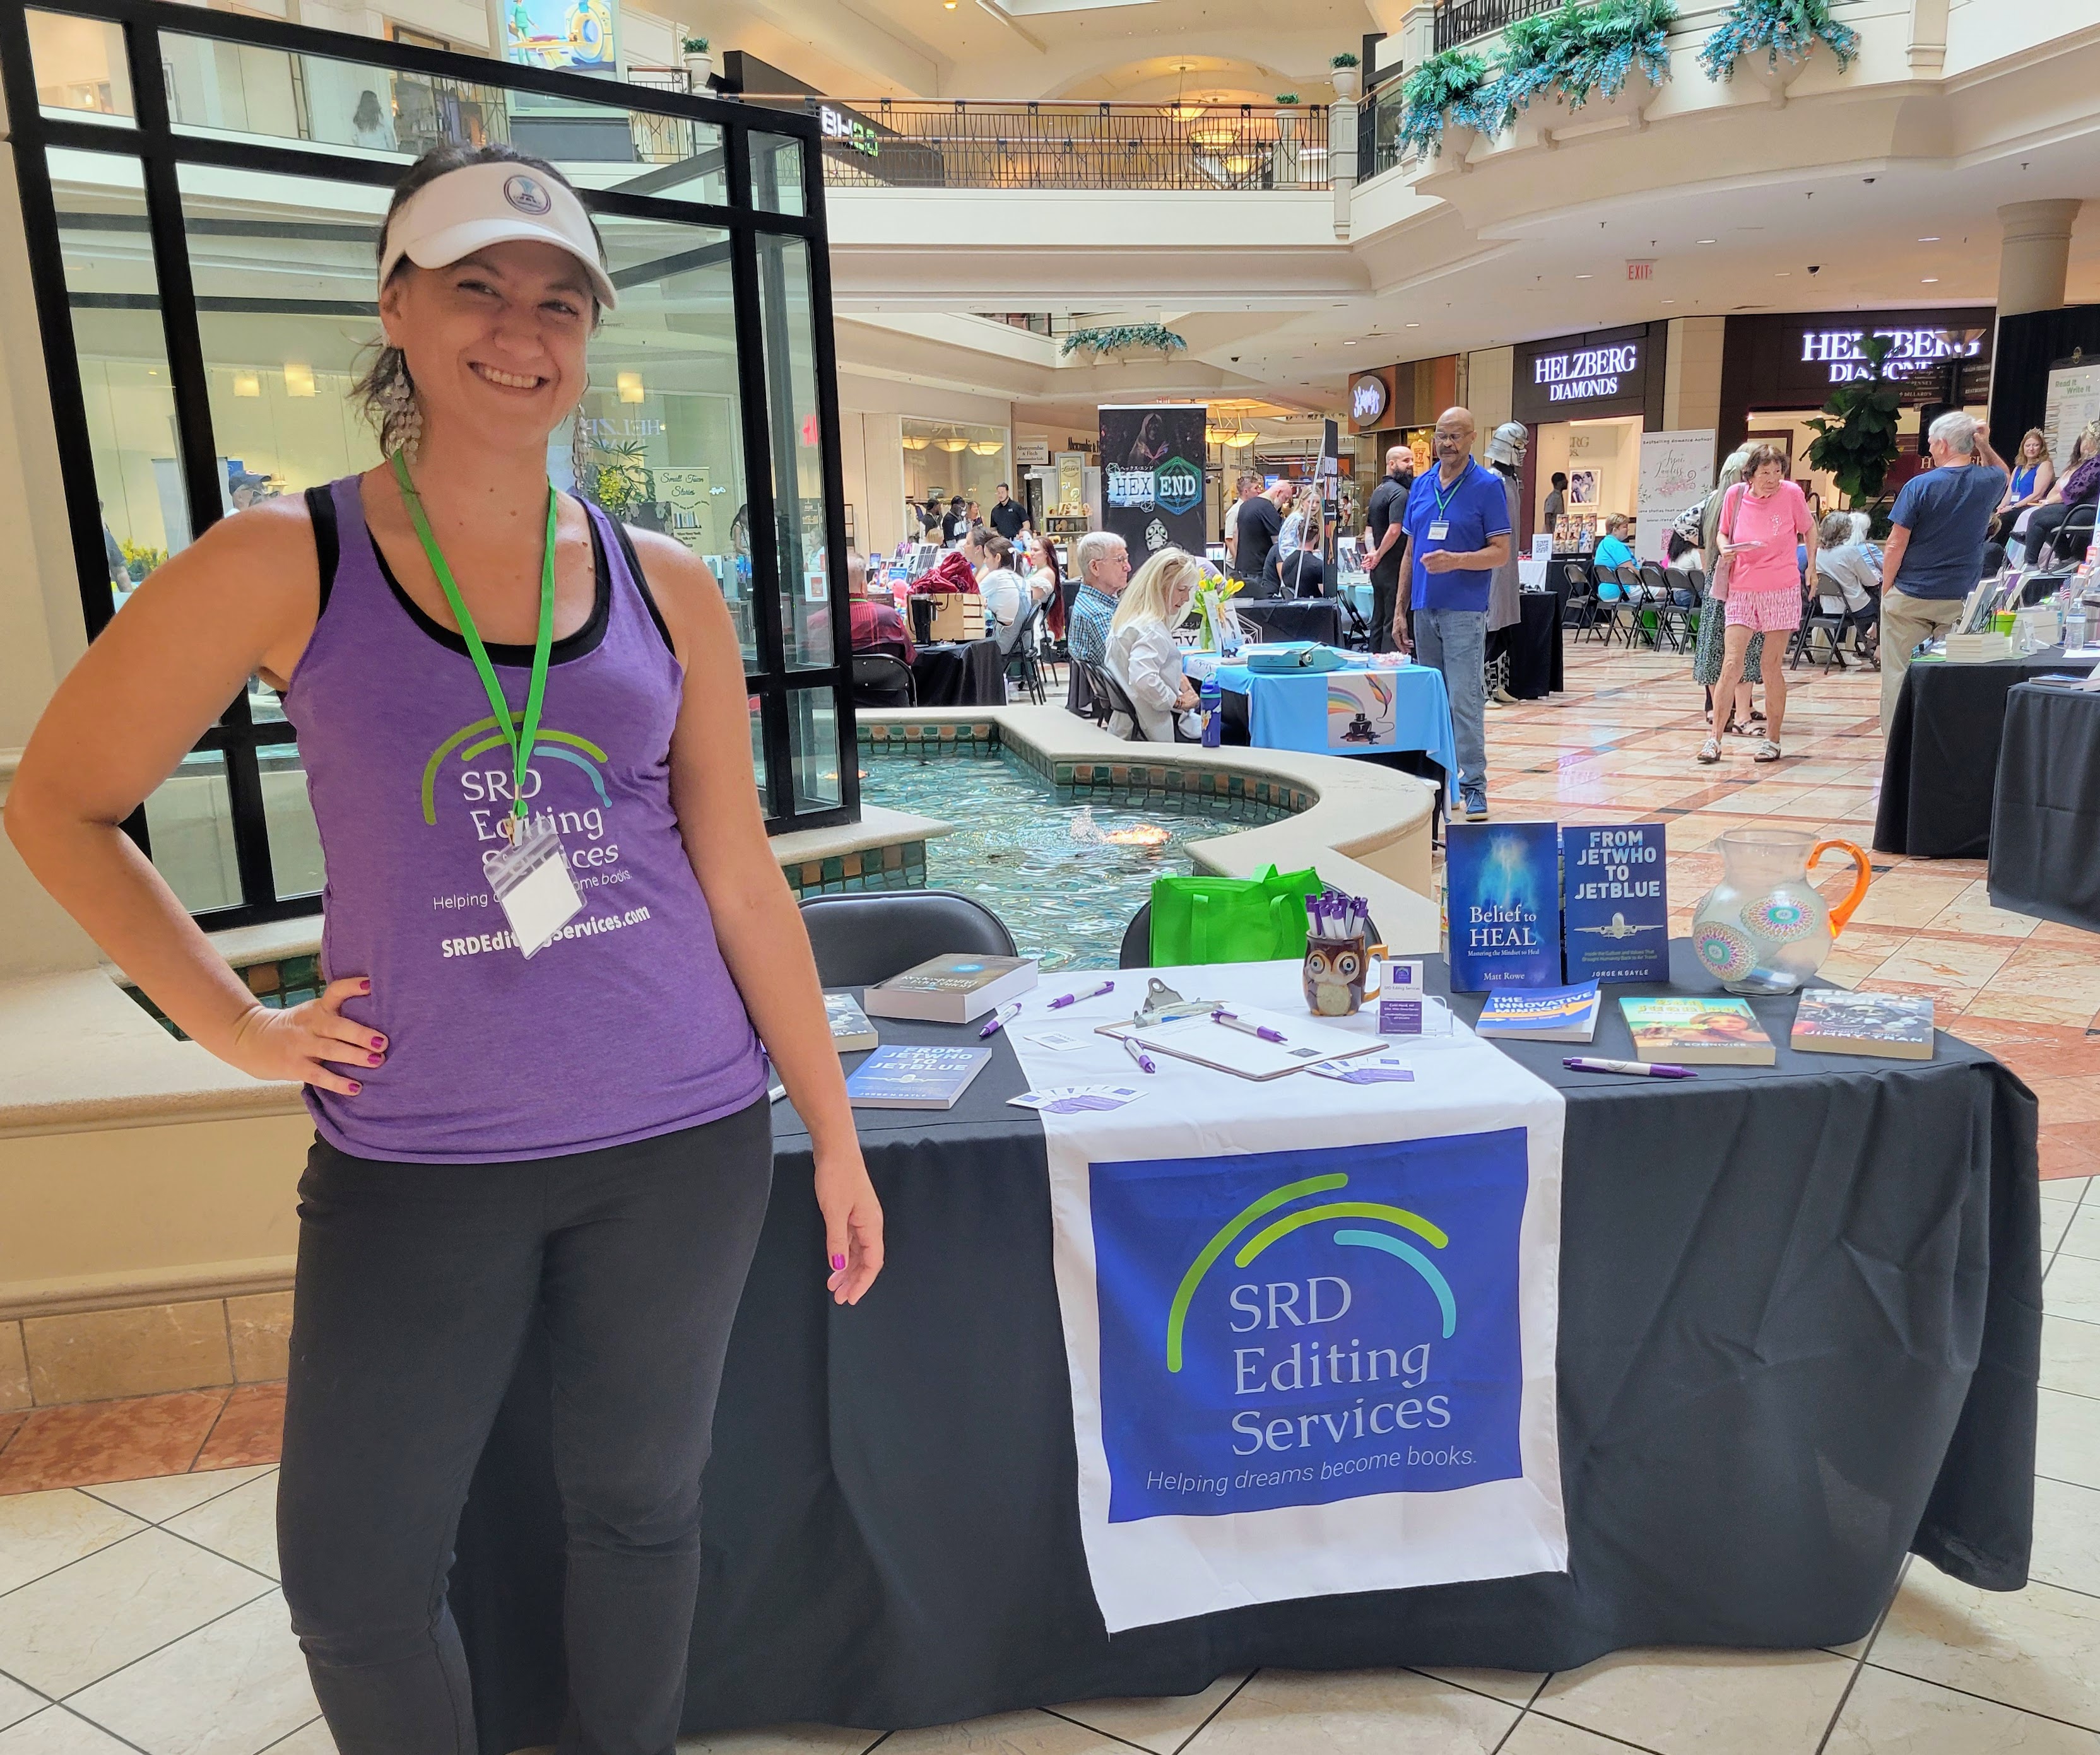
Cortni Merritt MA stands next to her table at the Read It Write It book festival in Wellington Florida on June 14, 2024

Read It Write It Book and Writing Festival

Editor Cortni had a wonderful time at the Read It Write It Book and Writing Festival 2024. The event took place at the Mall at Wellington Green on a bright and sunny Saturday, June 15, a perfect backdrop for the sunny group of writers who met to swap ideas and share their stories. While most writers were local to central or south Florida, at least two had traveled from Georgia and South Carolina to connect with other authors.
The most represented genre was romance, with everything from sweet to spicy making an appearance. Additionally, fiction genres of various authors included fantasy, small-town mystery, and science fiction.
Our editor also spoke with authors of nonfiction, including memoir and social/political critique and analysis. Additionally, several authors at the event were showcasing their children’s books as well.
Speaking of a showcase, SRD Editing Services was privileged that several of our own writers were kind enough to send copies of their printed books to display and distribute. Cortni gave away several copies of various books from the display at no cost to interested people. We love sharing and promoting our authors’ work and hope everyone who walked away with a copy enjoys their gift!
SRD Editing Services display table at the Read It Write It book and writing festival 2024
SRD Editing Services display table at the Read It Write It book and writing festival 2024.
Throughout the event, there were several highly interesting panel discussions. Panelists included award-winning authors and publishers of a variety of materials Unfortunately, due to our table placement and the acoustics of the venue, they were sometimes difficult to hear unless stationed near the seats at the front of the stage.
When visiting various writers’ tables, we saw inventive, interesting merchandise from numerous authors, including 3D-printed figurines of characters, colorful and creative stickers, bookmarks, calendars, and notebooks. Several writers described using QR codes to lead readers to Spotify playlists that accompanied their stories.
Perhaps most interestingly, one author of a children’s book explained how he integrated a QR code for readers to scan in order to access augmented reality features designed to enhance the kids’ reading experience. How cool! Can’t wait to check it out.
There was so much talent that the room was bursting with it. In addition to all the writers, publishers, and illustrators, Cortni even chatted with a few future editors who stopped by the table to ask for advice.
At the end of the day, no visitor left empty-handed. Whether you picked up some merch or some swag, you at least walked away with the knowledge that the book reading and writing communities are strong in South Florida.
SRD Editing Services is looking forward to maintaining these new connections and growing these new relationships with all the Read It Write It authors over the next year. In fact, the date has already been announced for 2025, and we’ve submitted our interest form. See you in June next year!
Posted on 1 Comment

How Long Will It Take to Edit My Book?

Answer to the question how long will it take to edit my book symbolized by woman's hand holding pen and marking up document.

Sometimes a question seems straightforward, like “How long will it take to edit my book?” but the answer can be a bit deceptive. There are a few variables to consider before you arrive at the right answer for your situation. 

In this blog, we’re going to consider what different timelines might look like if you get your book edited by a professional. But if you’re interested in some steps you can take to self-edit your work before hiring a pro, take a look at these blogs for some suggestions: 

Self-Editing Checklist for Authors

29 Words to Cut from Your Novel

Self-Editing Tips: Use CTRL+H to Edit Your Novel

If you’re thinking, “I want to hire an editor for my book, but I don’t know how long it will take,” read on! 

Different Levels of Book Editing

One of the biggest factors in how long it will take when you get your book edited is the level of editing your book needs. If you are an amateur writer who is just getting started, you may not have a clear idea of what these terms mean or what the results will look like after your book has been out through that round of editing. 

Please don’t expect an editor can” fix” everything in a single round. If you have questions about what is included in your editor’s services, you should ask. When you get your book edited, you should always have a clear understanding of what your editor is doing. If there is something specific you want them to do, make sure to address that with them.

Developmental Edit

A developmental edit can take several months. Many people think, “It won’t take that long to edit my book,” and sometimes it doesn’t, but if you want the ultimate package that includes feedback, direction, and coaching, you shouldn’t rush this process. 

Typically a developmental edit happens when you haven’t yet finished your manuscript. Maybe you need help brainstorming or finishing the writing of certain sections. If you’ve got a plot hole you don’t know how to fix, or you’ve written everything except the conclusion, or you’re not sure about big-picture things that affect the whole book (like pacing, structure, and tone)…look at your developmental editing options. 

This level of editing will help you cross the finish line if you haven’t gotten to the goal word count you’re reaching for, or it will help you cut down the manuscript to a marketable length if you’ve overshot the ideal word count for your book’s genre. Think of it like professional “workshopping,” where an experienced editor (who is often also a writer) helps with way more than just the technical elements of grammar, spelling, and punctuation. 

Content and Structural Editing

Content editing can reasonably be expected to take a few weeks to several months, depending on the length of your manuscript and whether you provide your editor with detailed directions for what you want. 

This level of editing most often happens once you’ve completed your manuscript, but often when you get your book edited with a developmental package, suggestions for the structure and content are included. 

Content/structural editing focuses on the storyline and pace, organizing the chapters or sections, and ensuring continuity and cohesion. If you’re not sure if chapters are in the right order, or if you want help from an outsider’s perspective with double-checking content and organization, content editing may be the right option. A content editor may or may not also include line editing and correcting errors as part of their process, and of course, if line editing is part of the process, content editing will take a bit longer. 

Line Editing

Line editing can go quickly when you hire a professional editor for your book. At SRD Editing Services, we estimate one week per 25,000 words for our line editing services, although most are completed sooner.  

A line edit is what people commonly mean when they say, “I need someone to edit my book!” A line edit frequently focuses on line-by-line changes, looking at specifics of word choice, repetitive wording, in-chapter changes, and corrections to elements of style and grammar. A line edit will often include more than merely corrections to typos and grammatical errors; it can also include suggestions for improvement, although these tend to be more focused and less sweeping than what you’ll find in a developmental or content edit. 

Copyediting

The least-intense, and therefore quickest, type of editingcopyeditingcan typically be completed by a professional in a week for most manuscripts of 100,000 words or less. If you’re looking to get your book edited by a professional, at the very least get it copyedited, even if you skip all the other editing steps and options. 

People often confuse copyediting and proofreading, so it can be helpful to be aware of the difference. 

Have your book copyedited as an MS Word document before you have it converted into a PDF or epub file by a professional graphic designer. Word has several valuable features that make it easy to search for and correct grammar mistakes, spelling errors, punctuation problems, and more. Once your manuscript is turned into a PDF, making changes can often be more difficult and involve more steps/more work. 

Have your book proofread after it’s turned into a PDF. Once you or a graphic designer has converted the manuscript into “what it will look like” to the consumer, you’ll want to do a final review to catch any small mistakes before the book is available to readers. 

Copyediting will likely involve correcting multiple errors on a page; by the time you’re proofreading, hopefully, your manuscript will need only one correction every four or five pages.

What Other Factors Affect the Timeline to Edit My Book?

While the type of editing you choose for your manuscript will naturally affect the timeline when you hire an editor for your book, there are other factors to consider that will affect how long it takes to edit your book.

Length of the Manuscript

While it seems self-explanatory, longer manuscripts usually take longer to edit. Although it’s not quite that straightforward. While a 10K-word manuscript may take less time than a 50K-word manuscript, if the shorter one needs a more in-depth edit (like a developmental edit) and the longer one needs less editing (like a copyedit only), then the two manuscripts may take approximately the same amount of time.

Genre of Manuscript

Complex or heavily researched manuscripts will take additional time due to fact-checking, reference-checking (whether as Notes or in a Bibliography), character tracking and consistency reviews, or structural analysis. Poetry, fantasy, sci-fi, and historical fiction and nonfiction are some examples of genres that commonly take more time to edit.

Experience and Approach of Editor

Ask yourself: “What’s important to me when I hire an editor for my book?” Editors, like writers, have different processes. If your editor is very experienced, they may have a standardized form or set of questions to help them save time. They will likely have a specific style guide they want to use, and if you are more familiar with those standards, you can save time collectively.  

Avoid an editor who claims to use AI to assist their editing. Amazon and other online publishers are now developing policies to prevent writers from uploading AI-generated materials. There is a fine line between AI-generated and AI-assisted, and mislabeling your content can result in severe penalties. 

Final Thoughts on Hiring a Professional to Edit My Book?

No matter what factors influence the timeline for your book’s edit, it’s prudent to underestimate that multiple factors can affect your personal publishing goals. A professional editor can make a reasonable or general estimate, but snags can always come up during the process when you get your book edited by a pro. 

Whatever timeline you and your editor agree to, it’s wise to add 10% as a cushion, especially if you have additional deadlines to meet after the edit. My book editing schedule includes extra time built in to account for the “unknown unknowns,” and I suggest you take this precaution as well. While it isn’t always necessary, clients (writers) are often happy when I plan for this extra time and end up having their edits completed ahead of schedule. Win-win.  

Ready to Hire an Editor for Your Book?

Posted on 2 Comments

Tools for Romance Writers: Ratings for Spicy Romance Novels

Although writers of all genres should consider how different readers may approach their text, it’s particularly important for writers of romance, erotica, or “spicy romance” novels to connect with readers who are looking for their content. That’s why everyone could benefit from a universal ratings system.  

As a reader, if there were a single standard for rating the “spice level” in books, it would be easier to select, recommend, and review books they love and avoid books that don’t match their preferences. As a writer, a single rating system would make it easier to connect with readers who enjoy reading about what you enjoy writing about. 

Oh! If only. 

While other types of media such as TV shows and movies have standard ratings systems that make it easier for viewers to identify age-appropriate and content-desired material, books are sadly a bit different. While many good romance authors are beginning to include “content warnings” (or “trigger warnings”) so readers are aware of specific content they may find upsetting (or particularly enticing), it’s not required nor a standard practice, although it does seem to be trending in that direction (especially with self-publishing authors). 

But without a universal rating system for books, it remains difficult for readers to have insight into what books are appropriate for them (or their kids, if they’re parents), and it remains difficult for writers to appropriately connect with the right readers. 

Rated Reads helps parents determine if the book their child is reading is age-appropriate (not just because of romantic or sexual content, but for a whole host of reasons.) Our blog last year on the Accelerated Reader Bookfinder tool may also be helpful.  

So what do writers and readers do? Well, here are a few things to consider if you enjoy reading or writing romance, erotica, or erotic/spicy romance.

What’s the Difference?: Romance, Erotica, & Spicy Romance Novels

It’s important to note that reader preferences vary, and what one person considers spicy or erotic may differ from another’s interpretation. The key is to find a balance that suits the preferences of the target audience while maintaining a coherent and engaging narrative.

Hiring some romance beta readers can help you gauge where your novel falls on these scales and help with your marketing and promotion plans. Beta readers in general, but specifically, beta readers who are avid fans of different types of romance, can be invaluable in helping you determine if your content has the “right” spice level for your target readership. 

If you are a romance reader and want to help writers hone and perfect their on-page spice, consider being a beta reader! There are numerous groups on Facebook and hashtags on IG and TikTok (aka “Bookstagram” and “BookTok”) where you can volunteer to be ARC or beta readers for the works-in-progress of all types of romance writers. 

Romance

Woman and man in wedding attire laughing next to table; man wearing hat and woman holding bouquet. Romance novels typically end with happily ever after.
Romance novels typically end with "happily ever after."

To begin with, a “romance” novel typically holds the romance and the developing relationship between characters as central to the plot. The best romance novel tips remind writers to keep the emotions as the story’s focus, and there should typically be a strong narrative arc in the journey of the characters, including challenges, conflicts, and resolutions. True romance novels build an emotional connection as they explore their feelings, and the end result for the reader is a satisfying emotional payoff or a “happily ever after” (HEA) ending. 

While there may occasionally be intimacy, often characters will engage in “relations” through euphemism or off-page action, similar to how movies or TV plots will show characters tumbling into bed, kissing, and then fade to black. Often, there is a fade-in afterward to show the characters’ emotional reactions to the events, but the focus is on the emotions and relationships rather than detailed sexual encounters. Even when sex scenes happen on-page, the characters may speak in euphemism or “softened” sexual language rather than explicit word choice from the author.

In movie-ratings terms, true romance novels can be at any major commercial movie level – G, PG, PG-13, or R. 

Erotica (aka Smut)

To begin with, an “erotica” novel typically places a strong emphasis on sexual content and exploration. The primary goal is to arouse and titillate the reader through explicit descriptions of sexual encounters. While erotica may have a plot, it is often secondary to the explicit content, and as all good romance authors know, the narrative may serve as a framework to connect erotic scenes rather than a central focus that details characters’ emotions and their journey toward a romantic connection. Beware of losing sight of the plot just to get caught up in “the action,” unless you intend to write erotica. While some erotica may explore emotional connections, the central theme is sexual pleasure, and the emotional depth is typically not as developed as in romance.

Erotica is known for its explicit and detailed depictions of sexual acts. The language used is often more direct and graphic, catering to readers seeking a more intense exploration of sexuality. Its content runs the full gamut of sexual fantasies, preferences, and kinks that you can find when reviewing the categories and tags of any website that publishes adult videos.

In movie-ratings terms, erotica is pretty strictly X-rated and higher.

Spicy Romance Novels / Erotic Romance Novels

man and woman in intimate embrace. He is shirtless, she facing away from him, he appears to be kissing her neck and removing her shirt; spicy romance novels balance sexual and romance content.

“Spicy romance” or “erotic romance” falls somewhere between traditional romance and erotica. These subgenres acknowledge and include explicit sexual content while maintaining a strong emphasis on the emotional connection between characters. Here are some key erotic romance novel tips:

Balanced Focus: Spicy or erotic romance strikes a balance between the emotional development of the relationship and explicit sexual content.

  • Narrative integration: Unlike erotica, which may prioritize sexual scenes over the plot, spicy romance integrates intimate moments into a broader narrative that includes emotional tension and character development.
  • Reader expectations: Readers of spicy or erotic romance are seeking a more sensual experience than traditional romance without necessarily delving into the more explicit and purely sexual nature of erotica.
  • Varied Heat Levels: “Heat levels” are often used to classify the level of explicit content in romance novels. Spicy or erotic romance can encompass a range of heat levels, allowing readers to choose the intensity of sexual content they are comfortable with.

Like the best rated-R movies can have very graphic, enticing, titillating sex scenes without losing sight of how those scenes play into the overall narrative arc and important relationship-building between the characters, spicy/erotic romance novels walk the fine line between turning on both their readers’ bodies and minds. 

Spicy Romance Novel Tips: Popular Ratings Systems & Resources

There are several tools and systems that readers and writers can use to assess the spice levels or explicit content in novels, especially in the romance and erotic genres. These tools are often referred to as “heat levels” or “sensuality ratings.”  Good romance authors would be wise to understand readers’ expectations and make the most of these rating systems and reader feedback to strike the right balance to connect with their audience. 

All About Romance (AAR) is a popular romance-focused website that provides sensuality ratings for romance novels. The ratings range from “Kisses” for books with no sexual content to “Burning” for those with explicit scenes.

Smart Bitches Trashy Books is a romance book review site that provides heat ratings for the books they review. The ratings range from “Sweet” to “Scorching.”

Romance.io is a fairly new (2 years old) book review site that provides a “steam” or “spice” rating for a variety of romance books and invites site members to add their own reviews and ratings. They offer a “similar book finder” so if there is something you liked and want more of, you can find it easily. 

Is the Book Spicy? blog focuses just on the spice ratings. No reviews. No spoilers. Just letting you know how steamy the book gets and what the tropes and triggers are for different titles. 

Goodreads, a popular book review platform, allows readers to tag books with descriptors like “steamy,” “erotic,” or “clean romance.” Reading reviews on Goodreads can also provide insights into a book’s heat level. (Connect with our editor, Cortni Merritt, on Goodreads!) 

Readers can use these tools to find books that align with their preferences, and good romance authors can refer to these and other online spice-rating systems to navigate the varying levels of sensuality expected from readers in romance and erotic novels.

How Writers of Spicy Romance Novels Promote & Connect with Readers

One of the most common ways to connect with readers of spicy romance is through newsletters. It’s a great way for writers to find both romance beta readers and eventually promote their finished books for sale. Many newsletters target in on specific subgenres, character types and tropes, and content that’s close to their heart, but here are a few ideas where writers of spicy romance novels can start brainstorming for promotion and marketing:  

  • Book retailer newsletters (Amazon, Barnes & Noble, Kobo, etc.)
  • Book review sites (Goodreads, BookBub, BookSends, etc.)
  • Book subscription services (Book of the Month, Romance Reveal Book Box, etc.) 
  • Blogs for romance, spicy romance, or erotica books/writing.
  • Social media groups (Facebook, IG hashtags, BookTok, etc.)
  • Forums such as Reddit r/RomanceBooks

By becoming a subscriber to a few newsletters or forums for the genre in which you write, you become familiar with the expectations, including the spice levels and standard ratings, for your spicy romance novels.

Writers of Spicy Romance Novels: Do Your Research

Among all the advice out there on how to write a solid romance novel, tips about incorporating spice are in no short supply. If there were a universal rating system, it would certainly be easier for writers, but since there is not, it is worth the time for a writer working to establish themselves or better target their readership in the romance genre to review several sources of reader feedback about spice levels. 

There’s a reader out there for every book! Don’t feel like you have to force your book to become too spicy if you don’t want it to be, but if you want to turn up the heat, just connect to readers who are looking for that level of burn, and your spicy romance novels and readers will enjoy the perfect match-up.  

Ready to talk to a romance novel editor?

Erotica, Romance, & Spicy Romance Novels Edited by SRD Editing Services

[bookshelf id="1716319548" btn_titles="Titles" btn_icons="" item_width="650" item_height="700" products_box_margin_left="20" product_title_textcolor="#ffffff" product_title_bgcolor="#c33b4e" product_margin="30" product_show_title="true" show_title_in_popup="true" show_selected_title="true" show_icons="false" thumbs_effects="true" buttons_margin="15" buttons_align="center" slide_duration="1000" slide_easing="easeOutQuart" arrow_duration="800" arrow_easing="easeOutQuart" video_width="500" video_height="290" iframe_width="600" iframe_height="430" exclude_products="" orderby="date" order="DESC" shelf_space="medium" skin="skin03" categories="romance-erotica-fiction-edited" post_type="bookshelf"]
Posted on 1 Comment

Tips for Science Fiction Writers: The Importance of Technology in Worldbuilding

Fictional space craft flying through a planet's atmosphere with exploding moons or meteors on the horizon. Red/black color scheme. Demonstrates technology tips for science fiction writers.

All aspiring science fiction writers want their speculative fiction to take their readers on a journey. In the dynamic world of storytelling, the role of technology extends far beyond mere gadgets and gizmos. “Technology” can mean many things. Especially depending on context. As a sci-fi series editor, it helps to understand the multifaceted importance of technology in literature, ranging from grounding characters in their surroundings to crafting futuristic worlds in imaginative narratives. In today’s blog, let’s focus on the beating heart of many futuristic narratives: technology, unraveling the layers and discovering how technology plays a crucial importance in storytelling when writing a sci-fi novel.

Featured image in header available from Enrique on Pixabay

Embrace Futuristic Concepts

Science fiction, at its core, thrives on imagination. The very essence of the genre lies in pushing the boundaries of what’s possible. The most imaginative writing tips encourage you to liberate your mind from the constraints of current technology and let your imagination soar. Embrace futuristic concepts that challenge the norm and redefine the technological landscape of your narrative.

Consider the groundbreaking work of writers like Isaac Asimov and Octavia Butler, who dared to dream beyond the limits of their time. Your ability to envision and describe advanced technologies is a key ingredient in crafting a truly immersive sci-fi experience for your readers.

Build Consistent Technological Systems

While the allure of the fantastical is undeniable, when writing a sci-fi novel, you must maintain consistency in your technological systems. This keeps your readers engaged. Establishing rules and limitations for your invented technologies adds depth and believability to your fictional world. The coherence allows readers to suspend disbelief and fully invest in the universe you created.

Think of your technological framework as the backbone of your narrative. Ensure that it aligns with the rules you’ve set and remains logical throughout the story. In addition to crafting an outline to help you know how the story will develop, you might also create a glossary or keep notes on how the technological elements function in your fictional universe. Whether it’s interstellar travel, artificial intelligence, or bioengineering, a consistent technological foundation will enhance the overall authenticity of your sci-fi world.

Science Fiction Writers Must Explore Ethical and Social Implications

As you craft your technological marvels, don’t forget the human element. Consider how these advancements impact the society and individuals within your fictional world. Ethical dilemmas and societal changes may arise from the introduction of groundbreaking technologies, and readers of sci-fi are generally here for it. Don’t disappoint! 

Among my favorite imaginative writing tips is the advice to explore the intersection of technology and humanity, like some of the most memorable sci-fi stories. Philip K. Dick’s classic “Do Androids Dream of Electric Sheep?” seamlessly weaves ethical questions into a narrative about artificial intelligence and what it means to be human. Integrating such considerations will elevate your storytelling and provoke thought in readers of all ages and backgrounds.

The Best Science Fiction Writers Blend Technology with Human Elements

One pitfall of many science fiction writers is the tendency to focus solely on their world’s technological aspects and neglect the human experience. To create a truly impactful narrative, it’s essential to blend technology with the emotions, struggles, and relationships of your characters.

Consider how your characters interact with and react to the advanced technologies of their world. Use technology as a tool for character development, exploring how it shapes their beliefs, motivations, and personal growth. This integration not only adds depth to your characters but also makes your futuristic world relatable and emotionally resonant.

Research Real-world Tech Trends

One of the less imaginative writing tips but one that can’t be overstated: You must research, research, research when writing a sci-fi novel. Your narrative may exist in the realm of imagination, but grounding your story in real-world tech trends provides a solid, familiar foundation for readers to relate to. Stay informed about advancements in science and tech, and use this knowledge to inspire and inform your storytelling.

Imagine the impact of self-driving cars, genetic engineering, or virtual reality on your sci-fi world and your characters. By incorporating elements inspired by real-world trends, you not only infuse authenticity into your writing but also offer readers a glimpse into the potential future based on our current trajectory.

Avoid Technological Overload

In the pursuit of creating a technologically rich narrative, this experienced series editor advises that you learn to strike a balance. Avoid overwhelming your readers with excessive technological details that might distract from the main storyline. Instead, focus on seamlessly integrating technology into the narrative, using it as a means to advance the plot rather than overshadow it.

Consider the pacing of your story—reveal technological details gradually, allowing readers to acclimate to the futuristic world you’ve crafted. A well-balanced approach ensures that your narrative remains engaging, with technology serving as a complement rather than a distraction.

Last Tip for Science Fiction Writers: Embrace the Journey

In the vast universe of science fiction writing, technology serves as a powerful vehicle for exploration and discovery. Aspiring science fiction writers, I encourage you to embrace the limitless possibilities that technology offers in crafting your narratives. From futuristic concepts to consistent technological systems, ethical considerations, and the integration of human elements, each element plays a crucial role in shaping a compelling sci-fi story.

Remember, the journey when writing a sci-fi novel is both personal and communal. Take risks, experiment, and explore the uncharted territories of your imagination. As you navigate the cosmos of your narrative, let technology be your guiding star, illuminating the path toward a captivating and thought-provoking story.

Happy writing, science fiction writers, and may your imagination soar beyond the stars!

Posted on 1 Comment

Write a First Draft: Tips for Fiction & Nonfiction Books

Closeup hands on laptop keyboard for write first draft tips

You may have heard that there’s no wrong way to write a book. When you make the goal to write, first draft jitters can easily get in the way, and without a plan or solid options for your process, you won’t know what’s right or wrong. 

Many pieces of advice for finishing your book first draft won’t work for you. Some advice will only work some of the time, and some advice may even cramp your style or bring on writer’s block if it’s not right for you. 

Let’s review some of the options to help you write your first draft of a book.

Maybe we should separate fiction and nonfiction. There’s similarities of the two, but distinct genres pose different challenges and require different approaches.

Tips to Write a First Draft of a Nonfiction Book

1. Find a Theme

You need a hook. A central theme. Something interesting and fresh that grabs the reader’s attention. It’s the only way to move them through the details of events to understand the story. Your particular insight should be striking and unique. 

For the first draft of a book, think about what makes your book stand out from others like it. Maybe yours is the first to approach a topic from a specific intersection of identities of race, culture, gender, and age. Maybe yours is like another popular advice guide or self-help narrative out there, except yours is aimed to people in a specific occupation or area of the country. 

Whatever it is that makes your book unlike others, identify and lean in when you write your first draft. It can help when you’re stumped about what to write next. Think: how can I connect this back to my central theme? Then, write to answer that.

2. Gather Information

For a nonfiction book first draft, begin with research using public information available online. For a genre such as memoir or biography, you will need to go beyond online materials, but for the first draft, you can begin with widely known sources. For genres such as self-help, spirituality, or some kind of guidance book, you can use internet sources for basic terminology or general background knowledge on complex topics. 

As you write your first draft, keep track of sources. Depending on the citation style your publisher (or you, if you’re self-publishing) chooses, there can be large variations in citations for books, interviews, websites, videos, etc. And if you want to quote from large sections of other people’s copyrighted materials, you may need to reach out to the publisher for the appropriate permissions to reprint. So keep your notes organized as you write a first draft.

3. Write in any Order

When you write the first draft of a book, start with an outline to at least get going. It doesn’t have to spell out everything, but at least have a beginning, middle, and end plotted out. Some people are “pantsers” and don’t do outlines well. Honor your process but start with something

However, no matter how detailed your outline, you don’t have to write it in order. If you’re writing real-life events, no need to start at the beginning and go through each scene chronologically until the end. Write according to what you remember, the scenes you’re most passionate about, the time allotted. Write according to whatever system works best for you but don’t think you have to go from beginning to end. You can skip around until everything is drafted.

Tips to Write Your First Draft of a Fiction Book (Novel)

1. Find a Theme

For a fiction book first draft, focus on characters and plot. Some elements of your characters will be similar to established characters in other books, film, or TV. What makes yours different? Some tropes in your plot will make it similar to existing books that people love. How are you going to implement a twist or be entirely true to that plot device, in support of your story’s central theme? Focus on making your story unique. In later drafts you will hone in on specifics of word choice and details that make your book poetic, literary, or grammatically correct, but when you write your first draft, keep in mind what about these people or their adventures will keep your reader along for the ride.

2. Gather Information

Oh! The rabbit holes you can go down when you write first draft material. Don’t fall into the trap! For your first draft, use brackets and margin comments to mark areas that you can go back to later, especially if you need to research. If you write historical fiction or sci-fi, you may find yourself needing to look up details of complex events, theories, or devices, but keep the writing mindset focused in creative energy. Simply note for yourself where you should research details when the time comes. 

For the first draft of a book, the details matter less. Keep a clear vision of your story and characters and focus on narrative arc. The research to fill in specifics can come later.

3. Write in any Order

One fun way to approach creative fiction writing for your book first draft is to write when the muse speaks to you or when inspiration strikes. Sometimes you can picture a scene perfectly in your mind, and the dialogue just comes to you. Sometimes you hear voiceover or narration for a particularly poignant moment, and you don’t know what has happened to make the character feel like they do, but the words are flowing from your mind to express that disconnected, unprompted feeling. You don’t know where the paragraphs fit into the story, but damn it, you know they are beautiful, and you will fit them in. 

All of that is okay. When you write a first draft, you should put together stories in whatever method works for you. If it’s a bit like a scrap heap that turns into a patchwork quilt, then so be it. The time may come to string those random scenes together to make a story, but for the first draft of a book, you only have to get the random scenes written down.

Conclusion: To Write a First Draft, Be Prepared & Open to Creativity

Don’t be intimidated to write your first draft of a book! It’s a huge achievement, and you’re going to do great. As long as you keep putting down one word after another, you’ll end up with a whole book manuscript before you know it. The key to success is to be prepared with an outline and some basic research, then be open to creativity and your own writing process, as long as you’re keeping the central theme of your book in mind.

Want help to write your first draft? Consider a book coach...

Posted on 1 Comment

Book Cover Design for Self-Publishing Authors with Book Brush

One black book and one white book with blank covers leaning against a brick wall. Discussion on book cover design

As a blog for writers and editors that generally focuses on how words are put together in a text, we don’t usually discuss much about book cover design, unless we’re talking about back covers and what goes on them. But today, let’s talk about front cover design.

I recently stumbled on Book Brush, and I have found it to be very useful and user friendly for a new author who is looking for easy-to-use and inexpensive software to help them design their own book covers and make their own social media and other marketing images for book promotion. This is not a paid nor affiliate promotion; I’m just telling y’all about a tool I like that I thought you might also like.

First, Consider Hiring a Professional Book Cover Designer

So, most of the time, I will tell you that hiring a professional is worth it, for a number of reasons. 

I understand why many people will choose to design their own book cover rather than hire a professional. Generally, the biggest concern for a self-published author is budget, and professional graphic designers and book cover design packages aren’t always budget friendly. 

If you have the option to hire a professional, you might consider it for the following reasons and evaluate them based on some of these criteria. If you are going to move forward with designing your own book cover, realize that you, as your own designer, will be held to the same standards as these professionals. Readers will expect a professional-looking cover, no matter whether the book had a huge team putting it together or was a one-person job. 

If you want to hire a professional and you’re working with SRD Editing Services on your manuscript edit, we can recommend several high-quality, experienced, and talented book cover designers. Please just ask!

Reasons to hire a professional book cover designer

  • First Impressions Matter: Your book cover is often the first thing potential readers see. A professional cover makes a positive lasting impression, increasing the likelihood that readers will look closer.
  • Genre Expectations: Professional designers are familiar with genre conventions and understand what visual elements are effective for different types of books. They can create a cover that aligns with the expectations of your target audience. This can contribute to better marketability and reader engagement.
  • Eye-Catching Design: Designers have the skills to create visually appealing and engaging covers that stand out in a crowded market. They know how to use color, typography, and imagery to capture attention and convey the essence of your book.
  • Technical Expertise: Professional designers have the technical expertise to create covers that meet industry standards for resolution, color accuracy, and print quality. This is crucial for both digital and print formats.
  • Saves Time and Frustration: Designing a cover involves various technical and creative aspects. Hiring a professional allows you to focus on writing and other aspects of publishing while ensuring that your cover is in capable hands.

But, if you are up for the challenge, you feel like you might have a little fun with your book cover design, and/or you are looking to save money with a less-expensive option than hiring a professional, BookBrush might be realistic option for you. 

A Little About Book Brush

Book Brush is a platform that provides tools for authors and publishers to create eye-catching graphics and promotional materials for their books. It is designed to help authors with marketing by offering a user-friendly way to create professional-looking images for book covers, social media posts, advertisements, and other promotional materials.

They offer customizable templates, a ton of book-related graphics, and the ability to add text and other elements to create eye-catching book cover designs. The website (no app) aims to simplify the process of creating promotional materials for authors who may not have graphic design expertise.

So sign up for free and check them out! 

What to Consider when Designing a Book Cover

Designing a compelling book cover is crucial for grabbing readers’ attention and conveying your book’s genre, central themes, style, and the experience of reading it. (No pressure though!) 

When designing your own book covers, here are some best practices to keep in mind:

  • Understand Your Genre:
    • Different genres have distinct visual conventions. Research successful book covers in your genre (“Shop your comps”) to understand common design elements and colors.
  • Eye-Catching Typography:
    • Use clear, legible fonts for the title and author name. Ensure the text is large enough to read even in thumbnail size but proportional to the overall imagery on your cover and of the same “mood” as your book’s central themes. Experiment with fonts that match your tone and genre.
  • Balanced Composition:
    • Create a visually balanced book cover design by placing elements strategically. Consider the rule of thirds, where important elements are placed along the intersections of an invisible grid.
  • High-Quality Imagery:
    • Use high-resolution images to maintain quality, especially for print covers. Images should be relevant to the book’s content and convey the mood or theme effectively. See below for more about stock images, but whenever possible, try to use unique images that you created yourself or that you have permission from the artist to use.
  • Color Palette:
    • Choose a color palette that reflects your book’s mood and genre. Consider color psychology to evoke specific emotions. Ensure the colors are visually appealing and work well together.
  • Readable at Thumbnail Size:
    • Many readers discover books online, so your cover should be recognizable and readable even in small-size images. Test your design by reducing it to thumbnail size to ensure it remains effective.
  • Test with Your Target Audience:
    • Before finalizing a cover, gather feedback from your target audience. You can use social media, author forums, or beta readers to get opinions on different design options.

Remember that a book cover is a powerful marketing tool, and investing time and effort into its design is an essential part of the overall book publishing process.

Want to read more about fonts?

Check out these two articles to learn more about what fonts are recommended for different book genres, both for book cover design and for the interior text. 

Best Fonts for Your Self-Published Book

Best Fonts for Books: The Only 5 Fonts You’ll Ever Need

Book Cover Design Tip: Use Stock Photos with the Right License

Without getting into too much detail about copyright law and intellectual property rights, (go research it for yourself), it is important to say that if you’ll be using artwork for your book cover, it should either be artwork that you created yourself (including a photo you took yourself), or an image that you have permission from the artist, photographer, etc. to use. 

If you don’t have a picture to use for your book cover design, you can’t just do an online search and download/screenshot whatever image you’d like to use and then cut-and-paste it into place. That’s in violation of the law. Instead, you can check for stock photos or artwork of the image you’d like to use. If the licensing rights include commercial publishing, you can use it for the cover of your book without having to seek additional permissions. Some images you might have to pay to obtain the licensing, and others you might be able to download for free. Some you can use “with attribution,” meaning you have to name the artist for the cover image on the copyright page or other public places. 

Here, I have put together a list of some platforms that I have personally used where you can find stock images for your book cover design and other marketing needs:

  • Pixabay: Pixabay provides a wide range of free images, vectors, and illustrations. It’s important to check the licensing terms for each image, as not all content is free for commercial use without attribution.
  • Pexels: Pexels is another platform that offers high-quality, free stock photos for commercial use. It’s important to review the licensing details for each image.
  • Adobe Stock: Adobe Stock is a premium stock photo service with a vast collection of high-quality images. While some images are free, many require a purchase or subscription. Make sure to review the licensing options.
  • Shutterstock: Shutterstock is a popular stock photo site with a vast selection of images. It is a paid platform, and you need to purchase a license for each image you use.
  • iStock: iStock is another paid stock photo site owned by Getty Images. It offers a variety of high-quality images, illustrations, and videos for purchase.
  • Depositphotos: Depositphotos provides a range of stock photos, vectors, and videos. It operates on a credit-based system, where you purchase credits to download images.

In fact–spoiler–I may use one or more of these for the images for my blog. Although some images are my own or I have permission, a lot of them are stock images. 

When it comes to using images or other content that you personally do not own, it never hurts to speak with legal counsel and seek professional advice on copyright law, intellectual property rights and protections, and licensing specifics. 

Easy Book Cover Design Software: Book Brush

Logo for Book Brush, a cloud-based book cover design software
Book Brush: Cloud-based, easy-to-use book cover design & marketing software

So I’m no graphic designer. But I have had to learn how to do some basic work in graphic design programs. Designing your own book cover is no joke. For some people who are visual artists and who pick up computer interfacing quickly, graphic design may come naturally and be a piece of cake. For me, I was glad when I found Book Brush and could actually use their tool in an easy and intuitive way. 

The templates help with shortcutting to genre specifications and expectations, and the user-friendly tools make things like font choice and placement (and color specs) simple and straightforward. 

And the price is right too. For less than what you would pay a professional book cover designer for a single project, you get a package with Book Brush that allows you to create and publish multiple covers. Overall, I think this is an excellent publishing tool that self-publishing authors should invest in if it’s the right choice for them and their publishing journey. 

Ready to talk to an editor?

Posted on 1 Comment

How to Face Rejection as a Writer

Sign saying "You got this" next to black computer screen. To remind writers how to face rejection.

Like any creative, you will hear a multitude of advice on how to face rejection as a writer. No two pieces of advice are going to work the same for any one person; each person will have to find what helps soothe or motivate them after a rejection of a draft submission, no answer or ghosting from an agent, or the negative reviews that readers can leave online which may feel like a rejection of the writer’s ability. (Oof.) 

No matter what type of writer you are, you face rejection. And here’s some tips to help you face it head-on when it occurs.

Tips on How to Face Rejection as a Writer

Remember that you are not your art. Your art is not you.

There are a thousand stories out there about rejection. Thousands. Millions. Of people who know exactly what it’s like to be told they’re not good enough in some capacity. Sure, it’s one thing to be told we’re being rejected for a job or a relationship, but when your art is rejected — something so pivotal that some people identify themselves wholeheartedly with it — that might be a whole other sub-variety of rejection unto itself.

Learn not to identify with your art.

All artists must learn to detach from their creative work. To learn how to face rejection as a writer, it’s crucial to understand that you are not your art, and your art is not you. Art is subjective, an expression of yourself but not all-encompassing and totally defining. Rejection by one group (or one agent!) is just one step in the process of allowing your art to express all aspects of yourself in an authentic, genuine, honest, and valuable way.

Understand the value of rejection & testing your mettle

If you are never rejected, how do you know your true worth? Like a child whose parents always say yes — Veruca Salt comes to mind — you will never know the depth of your own disappointment or have the chance to test your resilience if not rejected. If you are accepted everywhere, are you ever truly welcome? And have you done good by humanity and by your own potential, if no one has ever really turned you down?

Writing often requires persistence and tenacity. The ability to keep submitting work despite repeated rejections is a hallmark of successful writers. Many famous authors faced numerous rejections before achieving success. Learning how to face rejection, how to persevere through, is essential for any writer looking to make a lasting impact. Rejection provides an opportunity to test what you’re made of, find out more about yourself. 

Release your creation

Roland Barthes and his essay “Death of the Author” is something that perhaps only lit majors spend a lot of time with, which is a shame for everyone else. At its core, the central idea is that you, as an artist, must cut loose your art from yourself; it must stand on its own in the world. You cannot follow it around and explain away its shortcomings. You cannot fight its battles against critics. Once you release it, you can’t constantly explain or defend it; it must fend for itself. 

Rejection of your art, your perspective, your creative expression is an opportunity for growth, perspective, and self-evaluation.

Become responsive to rejection

Rejections can lead you to explore new avenues and take creative risks. If one type of writing consistently faces rejection, an adaptable, flexible, and creative writer may be encouraged to try different genres or styles, expanding their horizons and ultimately becoming more versatile and well-rounded in their craft. Respond to the situations you’re in; adapt and overcome as necessary. One (very successful) way how to face rejection as a writer is to write to your strengths; it just might take some trial-and-error to figure out what they are.

Accept misunderstanding

Understand and realize that being misunderstood is inherent in the creative process. Some people won’t “get it,” and their rejection can help you become a better artist. That’s normal and expected. 

As a writer, if you want the reader to understand what you mean, it’s your job to be clear in how you express yourself. (Of course, this doesn’t mean you have to be straightforward, do things the same way as others, or cut short your poetic expression, but if you want someone to get it, it’s your job to give it to them.) However, not all art is for everyone, and as the great Bob Marley said, you can’t please all the people all the time.

But rejection offers you the opportunity to develop your character and emotional maturity, the opportunity to evaluate an aspect of your art that perhaps you did not evaluate before. It encourages humility, patience, and the ability to accept that not everyone will appreciate or connect with your work. These qualities can be valuable not only in writing but in life as well.

See if the rejection can help you shape into a better writer. Then, take what is useful and disregard what is not. Wish the rejector well and keep moving. Not all things are right for all people all the time. You can’t, and won’t, please everyone.

Seek social support

Learning how to face rejection as a writer can also involve seeking support and feedback from peers, writing groups, or mentors. Sharing experiences and receiving constructive criticism from fellow writers can be immensely beneficial.

A Growth Mindset Is the Top Method for How to Face Rejection

Overall, let’s underscore and re-emphasize the idea that rejection is a fundamental part of your growth and self-discovery. Learning how to face rejection is essential in a writer’s journey. Rejection fosters growth, resilience, and the ability to navigate the subjective world of literature, not to mention content creation and all creative expression. Learning to prepare for, anticipate, and not be deeply wounded by rejection will enable you to persevere and ultimately succeed in your craft.

Rejection is hard. Let an editor help you prepare.

Posted on Leave a comment

Proofreading for University Reports: Editor Cortni & Keiser University Vice Chancellor Discuss Academic Writing & Editing

Colored sticky notes, pens, and markers used to keep organization in academic writing

As a writing and editing professional, editor Cortni Merritt is sometimes asked to consult and collaborate on a variety of academic, technical, and business writing projects in addition to her projects with SRD Editing Services as a member of other groups not associated with SRD Editing Services. Recently she was honored by the request to participate in a crucial academic writing project at Keiser University in Florida

As an accredited institution, the University is required to assemble a comprehensive compliance report for the accreditation board every five years, and as a professional familiar with academic editing, Cortni was asked to assist with proofreading and finalizing the report before its submission to the board.

“The need for an editor isn’t about a lack of ability on the part of the writer; instead, it’s about a division of labor. When it absolutely has to be right, we will use a team approach.”

The Big Picture: Proofreading a Year-Long Collaboration

In the spring of 2022, Cortni introduced herself to the accreditation report writing team at Keiser University, composed of faculty, staff, deans, and experts in higher education writing and documentation. The timeline was laid out: Over the upcoming 12 months, teams of primary and secondary content developers would submit their materials to a compliance committee, and only after all materials’ content had been finalized would Cortni be asked to review and proofread for technical accuracy, using a KU-specific style sheet, based on combined elements from the Chicago Manual of Style and the APA Publication Manual

The final report to be submitted to the accreditation board in spring of 2023 was estimated to total around100 pages of narrative essays with 200 more pages of additional supporting documentation, which would not be subject to the proofreading process. However, Cortni was informed that there may be additional front matter, back matter, and appendices that might also need editing

Needless to say, it was quite the challenge! But if there’s one thing Cortni loves as an editor, it’s a new challenge. 

Associate Vice Chancellor of Academic Affairs, Dr. Michael Record, located at the University’s flagship campus in West Palm Beach, Florida, was lead project manager for the entire team of contributors, including Cortni from her office in Orlando, Florida. After the report was submitted and the project complete, Dr. Record generously shared his post-project insights about academic writing, professional editing and proofreading, and project management with Cortni in the following interview transcript.

Process, Standards, & Style: SRD Editor Interviews Dr. Michael Record

The following is compiled from multiple conversations in May 2023. Content is compressed and edited for clarity, organization, and story; some identifying information is redacted to protect confidentiality.  

Cortni Merritt: Well, Dr. Record! We finally reached the end of this large group project.  This involved so many highly educated specialists and subject matter experts. How many people were involved in the report writing (with all the writers, reviewers, committee members, advisors, etc.)?

Michael Record: Indeed! A big project. We had approximately 30 secondary developers writing on behalf of approximately 15 primary developers submitting their drafts to a compliance committee of approximately 20 people. Given a little bit of overlap in these appointments, I would say 60 folks contributed. 

For clarity, I’ll add that the chancellor and his management team [at the flagship Florida campus] served as primary developers of content…secondary developers did most of the writing on behalf of [their] vice chancellors. In most cases, [the report writing teams] would run their narrative by the primary developer for approval before submitting it to the compliance committee. 

CM: And after the compliance committee approval, it was sent to Cortni for final proofreading

MR: Well, that was the original idea. But, unofficially, we found a lack of quality in what was submitted…so the compliance committee chairperson and I—I have served on several on-site reaffirmation committees—with the assistance of the [lead] editor, who has served as a reviewer on accreditation teams, did a lot of rewriting…and then it would get sent to Cortni for proofreading, eventually.

CM: So the report went through a lead editor and a proofreader in addition to all the writing, rewriting, and review, is that right…?

MR: We had a [lead editor] who spent probably 40 hours. Would you estimate your contributions as proofreader at 25 hours?  

CM: Yes, about that. Maybe 30…how many hours do you think went into preparing this report in total? 

MR: That is difficult to estimate, but here’s my thinking: each team of 3-5 secondary developers would probably spend an average of three hours per person developing, reviewing, and gathering documents. A rough estimate for the secondary development [is] 330 hours.  

At the compliance committee, let’s say another 240 hours. And, I would ballpark the same for the time spent by the compliance committee chair, me (as project manager), and about 30 for the vice chancellor, bringing the total to somewhere in the neighborhood of 750 staff hours. 

CM: Wow. I think that goes to show that it takes a lot of preparation and preliminary work in a writing projectreally, any academic writing project but especially one this size. So many people think that the first draft is the last draft, but there’s unseen steps for development, revision, and rewriting…all before editing even starts!…Since so many of the contributors were experienced writers, did it seem like “overkill” having both an editor and a proofreader? The copy must have been pretty clean to begin with.

MR: Well, people who don’t understand the publishing process don’t realize that the need for an editor isn’t about a lack of ability on the part of the writer; instead, it’s about a division of labor. When it absolutely has to be right, we will use a team approach.  

I can share my surprise at learning that the final report that gets handed in by the committee to the accrediting agency is almost completely narrative. For each standard, one does ultimately “check” whether the institution is in compliance, partial compliance, or noncompliance…however, that is followed by analytical narrative. 

In other words, a compliance report is ultimately a Word document. There is no way to summarize or digest an institution’s compliance with the standards of an accrediting body. Lengthy academic reports ultimately determine the continued good standing of an  institution in an accrediting body, meaning the quality of writing matters significantly

[And that’s why it’s important to understand] the capability of your team and your report writers. In some cases, the folks generating the copy were not academics, [but] it is not necessarily a good assumption that an academic [writer] will produce copy appropriate for [this type of specialized academic] report, even if that individual is an accomplished scholar with lots of publications on his or her vita. 

Quick example: it’s shocking how many ways of styling the name of a degree a group of university faculty and administrators can come up with: master degree…masters degree…master’s degree…Master’s of Science…Master of Science…Masters in Science…Masters Degree of Science…Masters of Science Degree…

It was impossible for the project manager—me!—to know how often a certain convention was going to be used, and whether it was going to be used often enough to require a rule governing it. Some of the best contributions you made as proofreader on the project were identifying issues that weren’t even addressed by the style sheet but needed to be. 

CM: Well, thank you. It was my pleasure. I’m glad I could help.

MR: You did! The main change in the process of editing is the ongoing development of the style sheet. Some organizations may have a style sheet that never changes or changes very seldom. A higher education institution that writes high-stakes accreditation reports every five years has a style sheet that is going to change a lot. 

With [more] issues identified, the next generation of developers is going to have even better guidance on what to do during drafting to lighten the load of the editor. Having a sufficient trove of issues identified along with advice about how to handle those issues makes generating the report a much easier task.  

You know, generally, division of labor based on experience makes everything easier. 

In this case, some people’s contribution [was] to conceive of the message, some people’s contribution [was] to write the copy, some people’s contribution [was] to gather evidentiary documentation, some people’s contribution [was] to evaluate and revise, and some persons’ jobs [were] to proofread and edit. When no one person is responsible for all of that, everyone can devote himself or herself to his or her own specific task, only do that, and do it really well. 

CM: That’s brilliant. Have experts focus on their areas of expertise.

MR: [That is why editing and proofreading were] important enough to be [their] own discrete stage of the report development process. Similar to when I wrote my doctoral dissertation and needed a professional editor even though the work I did for the institution at the time was similar to that of a professional editor, we needed an editor for this project who was not a developer—someone whose responsibility was not to write, or even necessarily to think about the institution’s compliance with the standards—because we wanted someone designated to handle the surface-level correctness of language.   

Had I to do it over again, I would start sooner and have a third phase (beyond primary and secondary [report writers]) whose job would be only to determine whether or not we were operating in compliance with the standard, but not necessarily to produce any copy. Then I would have a hand-off to the secondary developers who would take the information learned during that phase and write about it. 

CM: A great idea for next time, right? We’ve been talking about the “standards” and “compliance” with them, which brings me to a more technical question about the report writing—what were these “standards” that the University had to comply with? What was the real purpose of this compliance report? 

MR: Well, there were 22 academic standards–areas in which the University must demonstrate excellence in order to retain our accreditation. We have to provethrough explanatory narratives and evidenciary documentsthat we have comparable facilities, classes, instructors, staff, policies, educational materials, etc., to similar institutions in Florida and throughout the southeastern US. 

So my primary purpose was getting an answer to the question “Do we comply with these 22 standards?” Our emphasis was [on providing] clear and complete answers. We hear a lot [at academic writers’ conferences, trainings, and seminars] about institutions that demonstrate compliance with part of the standard or what people’s impression of the standard is. 

Our approach in this report writing…was to break each standard into clauses, turn each clause into a subheading [in the report], and clearly demonstrate compliance with the clause of the standard within that subheading.

Beyond that, our focus was self-examination. Most institutions focus so much in their report writing on demonstrating compliance that they lose sight of the opportunity to learn about themselves. 

CM: What a fascinating, yet straightforward, process. Sounds like you basically reverse-engineered an outline for the report and created writing prompts for each section. 

MR: Exactly! 

CM: And so, what’s one piece of advice you’ll share? Something you think writing project managers ought to know?  

MR: The best advice I can share for working with a large team of content specialists is to acknowledge that just because someone is accomplished in a particular field of scholarship doesn’t mean that individual knows technical writing. 

In this context, all that means is answering the question that was asked, answering it completely, answering it clearly, and providing all the evidence the reader needs to believe the answer. 

The best specific tip I can offer is to take that team of academic writers through a series of examples and nonexamples of successful [report] writing. It can be enormously instructive to show teams of writers samples of well-written narratives that don’t answer the question, don’t provide evidence, or aren’t complete. This is an experiential approach to discriminating between good writing that demonstrates compliance and good writing that doesn’t demonstrate compliance. 

CM: As an editor, I can see how I would apply that advice to all types of large writing projects—book manuscripts, academic articles, business websites, etc. Thank you so much for sharing that wisdom!  

So, I have one final question for you, Dr. Record. I’ve seen a post online that suggests that it’s time for academia to replace “et al.” with “and besties” in citations. So instead of “Smith et al.,” citations would become “Smith and besties.” What are your thoughts on this?  

MR: That’s cute, and while it’s a joke, it’s actually a great teaching strategy. Instructors don’t acknowledge the subvocalization process often enough. When people read, their brains “pronounce” the words, and when our students don’t know how to pronounce something, they skip it—or they get frustrated and stop working. When I taught in Florida classrooms, I always taught students very intentionally how to read college-level material. I taught them to subvocalize “Smith (2022) observed…” as “Smith in 2022 observed…” As simple as that teaching behavior was, it was the difference between a group of emerging scholars warming up to academic discourse versus feeling alienated by it. I taught academic writers to read “Smith et al.” as “Smith and others,” but I will be using “Smith and besties” from now on. 

Cortni Merritt, SRD Editing Services & Academic Writing & Editing Projects

As an experienced proofreader, academic editor, and writing project manager in Florida, Cortni is always expanding her areas of expertise. This experience proofreading materials for Keiser University was one of many in the realms of business and technical writing and editing projects that was recently on Cortni’s calendar, but you can expect SRD Editing Services to be involved in similar University projects in 2023 and 2024. 

Posted on 2 Comments

How to Write a Back Cover Blurb & Online Book Description

Hand selecting book from a shelf; how to write a back cover blurb

Wondering how to write a back cover blurb for your book? Especially if you’re venturing into self-publishing, this can be a sticky and even controversial topic. You are not alone as a self-published writer wondering what makes the best back cover copy for your book. Self-published authors grapple with this every day, working to create an enticing summary that compels readers to open their book and dive in. Today let’s discuss some of the key elements that make your back cover blurb the best it can be, regardless what genre you’re publishing.

Back Cover is Both Sales Pitch and Art

Essentially, the back cover of your book is a teaser that provides readers with a summary of the main plot points that set the story in motion, while giving your reader a sense of the theme at the heart of the story, and without giving away too much that the reader feels disappointed if there is no more to the book than what is included on the back cover. No big deal, right?

Your back cover is also a sales tool, as it often pitches the story to a potential reader before they have any other exposure to it. It should intrigue potential readers, making them eager to discover what lies within. A well-crafted blurb may also feature a brief endorsement from a fellow author, ideally someone well-known in your genre who can vouch for your writing prowess and the merits of your work. But a lot of readers become disengaged if the back cover is nothing but endorsements and blurbs, so make sure that if you include an endorsement, it’s a real doozy.

How to Write a Back Cover Blurb: The Structure

Typically, there is a common approach in how to write a back cover blurb to address the main questions readers have without violating space constraints. Most professionals divide the back cover of a book into a structure of four paragraphs. The opening paragraph addresses the central questions of your story: What does your main character desire, and what obstacles stand in their way? If you can distill these key elements into just a few sentences, you’re on the right track.

In the second and third paragraphs of your back cover blurb, you should also touch on the main themes of your book and offer hints about your target audience. Tell your readers: Who will love this book? Some authors mention comparable titles, while others incorporate keywords, major themes, and symbols that readers can infer from language choices.

Throughout the back cover blurb, keep readers guessing by offering them something “the same but different” as you nod to the familiar while presenting something fresh and exciting. You want your book to feel both comforting, like a cozy visit to their favorite place, and adventurous, like an exploration of uncharted territory.

If Including an Author Bio

For your author bio, keep it concise. Limit it to two sentences, sharing your background, what you’re known for, and your current achievements. If this is your debut novel, mention that specifically. If readers want to learn more about you, they can easily find additional information via a quick online search or by visiting your website.

What About the Online Book Description?

Now, let’s talk about online book descriptions, which is a bit different from how to write a back cover blurb but a lot of the same principles apply. So the thing about physical book descriptions is that they take up real space on a real object, and they have to fit within standard limitations in order to be palatable to real readers. Unlike physical book covers with space limitations, online bookstores allow more flexibility with description length, but you must make sure to strike a balance.

So in your online book description, you can go a little wild. Within reason.

While you can provide more information online, avoid giving away the entire plot or revealing the ending before readers make their purchase. Don’t give away the whole book for free. You don’t want your online description to become too wordy. Keep it to the point and engaging, so readers will be enticed to hear everything you have to say.

Tips for Clickable Online Book Descriptions

Today’s tips for online book descriptions that maximize click-worthiness:

  1. Summarize what readers will gain from your book: Begin with a compelling “In this book, you’ll learn…” statement.
  2. If your book is part of a series, dedicate a few sentences to providing context and building anticipation for readers by discussing previous and upcoming plot points.
  3. Consider adding content warnings and comparisons like “Perfect for readers of…” to help readers identify if your book aligns with their interests or preferences. Highlight aspects such as female-led groups of characters, LGBTQ themes, or neurodivergent representation to attract your target audience effectively.

How to Write a Back Cover Blurb: Take the Time to Get it Right

By mastering the art of crafting back cover blurbs and online book descriptions, you can engage potential readers and entice them to embark on a literary journey within the pages of your book. Some writers love polishing their back cover copy and online book descriptions, but if you’re not sure how to write a back cover blurb, consider workshopping it with other writers or seeking professional advice. It’s such an essential part of your marketing package and sales tools that it’s worth the time it takes to get it to Goldilocks-perfection: Just right.

Ready to speak with an editor about your back cover blurb and online description?

Posted on Leave a comment

Writers Talking Writing: TV Writer Shonda Rhimes’s Tips to Lay Track

Cover of book by TV writer Shonda Rhimes titled "Year of Yes"

Lessons on Life from a TV Writer

Earlier this year, I listened to the audiobook for Shonda Rhimes’s Year of Yes, a successful and interesting TV writer with decades of experience (if you don’t know who she is.) In this mix of memoir and self-help advice, both funny and touching, Rhimes shares her wisdom about how to embrace personal growth and new opportunities.

You must open your mind to new opportunities and experiences in order to overcome stagnation and truly grow. Nothing new will happen to you if you don’t say “yes” to anything new. If you want to break free from the constraints of the familiar and mundane, Rhimes argues, you must be open to the unknown.

The book is particularly relatable for writers, mothers, and Black women—and even if you are not all of those things, you may be able to relate to her clear and insightful revelations about her experiences as an introvert. I could relate! I understood exactly what she was talking about when she said she was fine fading into the background, although she obviously had a larger-than-life personality.

Lay Track like a TV Writer

One striking metaphor Rhimes employs in the book compares writing for successful TV shows to laying down train tracks, and even non-TV writers can relate. Shonda describes how she knew the train was coming; the production schedule must run on time. She details her intense feelings of pressure to keep the schedule on track. She knows she can be flattened by that train.

To help her maintain focus and meet her writing goals (while avoiding being overwhelmed by industry demands), Rhimes lays out 6 tips on “how to lay track” as a TV writer. Even if you’re not a writer for a big, successful TV series (or three!), try these out to see if they can help you be more focused and productive in your own writing process.

  1. Establish a routine. A daily routine provides structure and can help you stay disciplined, focused, and productive. Designate times to complete your writing, whether you write for a specific period of time or until you reach a certain word count; it’s the consistency of sitting down to write at the same time that can help.
  2. Set clear deadlines. Clear, nonnegotiable deadlines create a sense of urgency and can help motivate you to meet your goals. In the case that you’re working on a collaborative project (like a TV show), deadlines for yourself will help you do your part to ensure everyone’s timelines stay on track.
  3. Say “no.” It can be difficult, of course, because we want to say “yes” to all the good, entertaining, pleasing things in our lives—like time with family and indulging in trips to restaurants and other places away from our desks—but if those opportunities are not aligned with your goals, they can derail your focus. To meet your deadlines, you will have to say “no” to some things and prioritize your work.
  4. Embrace productive procrastination. To be at your most creative, you need the space to brainstorm and think, so not all procrastination is bad procrastination. Sometimes, letting your mind wander allows you to come up with something great, new, and creative. So allow yourself to take a break if it helps you be your creative best.
  5. Accountability. Do you have a team that holds you accountable? Or even just one single “accountability-buddy”? Get one. Whether it’s your partner, your kids, your colleagues, or the rest of your writing team, use the power of positive peer pressure to help you make steady progress and deliver on your commitments.
  6. Create a dedicated workspace. This should be a sort of “sacred” writing space for you. A space where you can be your most productive, feel free to think, and that helps you envision yourself as a successful, competent, productive writer. Set up an area that helps you feel comfortable, but not too relaxed, and ready to work.

In addition to these tips on how to successfully lay track in your writing, Rhimes also discusses some of the less glamorous aspects of being a TV writer, such as the eye strain (and necessary eye care for writers) that comes from staring at a screen for long hours and the weight gain that can occur if you maintain a sedentary lifestyle and don’t balance laying track in your writing with actual movement of your body. And in all her discussions about these real-world writerly topics, Rhimes remains funny as hell.

More Life Lessons

If you’re not familiar with Rhimes’s work, do yourself a favor and try this book on for size. You’ll find some heartwarming lessons about navigating physical, mental, and emotional challenges, particularly those faced by a successful TV writer. No matter what other self-help books you’ve read, you’ll find in Year of Yes an inspirational message about embracing your own paths of growth and self-love.

Are you a TV writer ready to talk to an editor?

Posted on Leave a comment

1 Year with EFA: Editor Training on Sensitivity

Two hands holding wooden letters spelling out "webinar"

July 1 is the first anniversary of SRD Editing Services’ membership in the Editorial Freelancers Association. In the past year, editor Cortni Merritt has taken some awesome editor training and webinar sessions provided by the EFA, and we wanted to tell you a bit more about what’s going on behind-the-scenes and in-front-of-the-screens at SRD Editing Services.

EFA Member & Public Webinars & Editor Training

The Editorial Freelancers Association offers a number of live trainings and recorded webinars. Most are accessible both to editors who are members as well as to the general public, however, a number of them are exclusive only to EFA members. While some webinars and trainings are free, others have an enrollment fee associated with them, although typically the fee is reduced for EFA members.

In addition to a series of webinars to help freelancers and business-owning editors enhance their business skills, several EFA courses focus on improving practical skills such as copy editing and proofreading, while others are meant to enhance the editor’s techniques within certain genres—mystery, memoir, children’s literature, etc. 

This year, editor Cortni Merritt completed and participated in a number of editor trainings that she felt could enhance practical technical skills across multiple genres, while also enriching the customer service experience she could provide to authors who choose SRD Editing Services for their editorial needs. 

The Art of Feedback

Although the MA program and editor training at Florida State University provided extensive practice on giving writers feedback, this hour-long webinar hosted by EFA Chief Executive Officer Christina Frey was a helpful refresher.

Napkin next to a red coffee mug showing feedback loop of "same old thinking" leads to "same old results" and vice versa

Feedback, especially from an editor, should be both collaborative and effective. The author must find it helpful, and above all, everyone must feel respected for feedback to be applied. 

When giving feedback, it is helpful for the editor to provide a neutral, “reader-first” perspective that is not based on opinion but instead on the authority of professional experience.

Authenticity Reading---What It Is & Why Editors Should Care

Authenticity reading, also known as sensitivity reading, is a type of pre-publication read-through for feedback in which the reader focuses on a specific area that readers might find unfairly portrays a group of people.

Most books have some content to which a particular sub-set of readers might be sensitive; different genres and books of different readership have different concerns, but when the writing might be considered “insensitive,” it should be evaluated for those concerns.

Trans Allyship for Writers & Editors

Writer and activist Davey Shlasko led this insightful editor training that examined how an editor can be aware and sensitive to trans identity and expression in the writing they edit. Above all, they say, “Be curious, be self-aware, and be willing to push past your comfort zone.” 

Flags depicting allyship with LGBTQIA+ community

In case of doubt about a person’s pronouns, ask! If you offer yours first (she/her), you may open the space for the other person to share theirs.

When assessing trans content, consider whether characters are being portrayed as real, whole people. Consider who the audience is and suggest further review from sensitivity readers as needed.

Lastly, Davey offered a variety of interesting resources for trans-ally copy editors, which I feel deserve (and will hopefully get!) their own blog: The Radical Copy Editor, The Conscious Style Guideand The Trans Allyship Workbook.  

Demystifying the Language of Disability

Writer and activist Emily Ladau has been educating audiences about life with disability since age 10. In this editor training, she encouraged editors to consider person-first, identity-first language as a part of recognizing and removing subtle ableist bias.

Line drawings of the shapes of people, some who are disabled and wheelchair users or prosthetics users. Line drawings are in a rainbow of colors

People often have preferences regarding the language used to identify them, and if you’re interested in knowing a person’s preference, ask! Some people find “disabled” preferable, while others prefer a euphemism, but a well-meaning editor can devalue thoughtful choices of self-identity by making assumptions.

Generally, Emily advises editing with one eye on the lookout for the tropes of disability and to focus on increasing affirming language and reducing use of disability-insensitive metaphors. While representation is important, a review from a person similar to one being represented is ideal–“Nothing about us, without us.” 

More Editor Training Planned for 2023-2024

It’s only in 2023 that we’ve really ramped up our professional involvement and development, first by announcing the SRD Editing Services membership in the EFA in January 2023, and then announcing our membership in the International Association of Professional Writers & Editors in May 2023. But there’s more coming! 

Subscribe to our blog or follow SRD Editing Services on social media to stay up-to-date with all the exciting announcements. More editor training for our team happening at the Workshop at Authors Publish magazine, as well as from the University of North Georgia. 

Connect with SRD Editing Services on social

Posted on 1 Comment

Tool for Children’s Book Writers (& Parents!): Accelerated Reader Bookfinder

Children reading a children's book. Boy and girl sitting next to a window.

For more than 20 years, the Accelerated Reader (AR) program has been helping kids read children’s books they enjoy, at their own pace. Readers of all levels can choose an AR book, read their way through it, then take a computerized quiz to assess their understanding and sometimes earn class credit. 

Educators across the US use it, and hundreds of thousands of kids across the country read millions of pages every year because of it. If you’re a parent of a child of any age, you’ve probably already heard of AR. 

But if you’re a parent who is looking to contribute more to your child’s reading goals and even help them find new books to read, or if you’re a writer of children’s books looking to keep up with trends, find stories comparable with your own work, or identify the reading level of your work, the Accelerated Reader Bookfinder website can be a great resource. 

This blog aims to provide both parents and kids lit authors an introduction and overview of how to use the AR Bookfinder site. Let’s take a look! 

Accelerated Reader Bookfinder logo for childrens book database
The Accelerated Reader Bookfinder website is a comprehensive database of information about children's books.

Using AR Bookfinder Website

Whether you’re a parent or you write children’s books of any level — from elementary to mid-grade, juvenile, or YA books — use the AR Bookfinder website for basic research. 

Now, when I was a kid participating in Accelerated Reader, there was no website–there was no internet. If I wanted to know what reading level a book was or how many points it was worth, I had to actually go to the library and examine the sticker on the spine of the book or ask the librarian. How times have changed!

Accelerated Reader Bookfinder welcome page for children's books
On the Welcome page, select the “Parent” option to explore AR Bookfinder without creating an account.

When you first land on the AR Bookfinder welcome page, you need to identify yourself as a student, parent, teacher, or librarian. Whether you’re a parent or a writer of children’s books, you can use the “parent” option to browse the website without creating an account.

For Parents: Confirm AR Children's Books, Reading Levels, & Points

Once you have identified yourself as a parent, use the “Quick Search” option to enter a title that your kid is interested in, to confirm whether it is an AR book, what reading level it is, and how many points it’s worth. You can also search an author name to see which of their works are AR eligible.

I’m lucky, personally. My kid is an excellent reader(!), but I have to constantly remind him to collect his AR points and meet his goal to earn the grade for his language arts class. Luckily, most of the books he’s interested in are in the AR Bookfinder database. 

We are sometimes at our favorite local thrift bookstore or the public library, or a friend will offer to let my son borrow a book, and with a quick search, we can find out whether a title he’s interested in is an AR book.

(In fact, one of our favorite books of 2022 — See You in the Cosmos — was one we borrowed from the public library then found out on AR Bookfinder that it was worth 10 points!)

For titles that may have multiple versions in print, it may be important to look more closely at the details of each book on your search results list. Some versions may be abridged, a graphic novel or illustrated version, or an annotated or enhanced version of the book–all of which might affect the reading level and point value. 

AR Bookfinder children's book results list of different versions of Alice in Wonderland
A popular title like “Alice in Wonderland” may have several versions available for your child to enjoy and earn AR points.

Advanced Search Options

If you’re not sure of the title or author name, or if you want to check more details about a book series, use the “Advanced Search” tab for more search options.

AR Bookfinder childrens books advanced search options and menu
Use the AR Bookfinder Advanced Search options to filter specific results.

By using the Advanced Search tab, you can peruse a specific children’s book series to see which titles earn AR points, or you can choose the “Interest Level” (i.e., reading level) to browse titles that might appeal to your child. 

Select from Lower Grade (K-3), Middle Grade (4-8), Middle Grade (6+), and Upper Grades (9-12) to filter a list that meets your child’s unique reading needs.

Use the Additional Criteria options to select a topic that your child is interested in (not just genres, but think of this more similar to tags, like “adventure” or “history”), as well as filter to look at only fiction or nonfiction children’s book titles.

If you have no ideas or starting points for your search, and your kid needs suggestions of children’s books, keep reading! The section below details how to use the “Collections” tab on the AR Bookfinder website to search for new titles, authors, or series your little one may love.

AR Bookfinder Tips For Children's Book Writers

As a new or still-learning children’s book writer, it can be tricky to know exactly what reading level or grade level you’re writing for. These “levels” may differ based on subjective criteria such as word choice, sentence structure, and topic.

Maybe you have an idea for a kid’s book, and you’re not sure who your audience is or exactly what age they are.

Or maybe you’re prepping your query letter and submission info for agents and you need to gather titles of children’s books that are comparable to yours. Either way, using the “Collections” tab in AR Bookfinder can help.

Explore "Collections" for Comps & Reading Level

Writers (and parents!) can use the “Collections” tab to explore two things: recent award-winning children’s books and trending and popular kids books.

AR Bookfinder website showing childrens book writers how to explore the Collections tab.
Use the “Collections” tab to explore award-winning children’s books.

Now, it’s possible that these lists will overlap, but just because something is award winning doesn’t mean it’ll be popular! And just because a title is popular with kids in a certain age group doesn’t mean it was critically acclaimed.

Checking out both options in the Collections tab can give you a full picture of what’s going on in children’s book publishing and how to position your title. 

When you select the Collections, tab you will see these two main options to peruse through the database.

By selecting the “plus sign” next to one of the options, you expand the menu for more specific information.

Under “Awards,” for example, you can find links to specific children’s book award lists, such as the Newberry Medal and the Coretta Scott King Award. 

AR Bookfinder collections show award-winning children's books
Use “Collections” to browse award-winning children’s books.

On the other hand, selecting the plus sign next to “What Kids Are Reading” opens a sub-menu with the three most recent calendar years. Select a year to open the next sub-menu, which says “Top 20 Fiction/Nonfiction Books of [YEAR]”.

When you select this menu, the next sub-menu opens, separating out each grade with a link. You can then explore the top 20 books for kindergarteners, first graders, etc., all the way through high school seniors.

AR Bookfinder children's books top 20 of 2020
Use “Collections” to explore top 20 titles for each grade level in most recent 3 calendar years.

For example, the Top 20 for 11th grade in 2020 includes classic titles such as The Catcher in the Rye and Huckleberry Finn, along with contemporary titles such as Divergent and The Hate U Give

Obviously, many eleventh graders are reading and taking AR quizzes on titles required for a class curriculum, but it’s also obvious that many eleventh graders are continuing to read children’s and YA books in which they’re interested and which are also AR books they can earn points on. 

Track Titles & Reading Goals with Goodreads!

Although the AR Bookfinder website does have a “favorites” feature, which they call the AR Bookbag, that allows you to save a list of titles; however, when using a Parent account, the Bookbag empties/clears its history when you close your web browser. That can be inconvenient for long-term tracking and ideas! 

Instead, our editor Cortni suggests creating a Goodreads account if you don’t already have one (and connect with Cortni on Goodreads!) Using Goodreads’ “shelf” feature, you can easily track all the books you’ve read, the ones you’re currently reading, and ones you want to read. 

Since a Goodreads account will last far beyond your child’s school years, it can be an excellent long-term tool to keep your kid reading far into adulthood. 

And for authors of children’s books, a Goodreads membership and active account can help you connect with your readers and keep them informed of your work and upcoming releases.

Ready to discuss your editing needs? Connect with a children's book editor!

Children's Books Edited by SRD Editing Services

[bookshelf id="1682092572" btn_titles="Titles" btn_icons="" item_width="650" item_height="700" products_box_margin_left="20" product_title_textcolor="#ffffff" product_title_bgcolor="#c33b4e" product_margin="30" product_show_title="true" show_title_in_popup="true" show_selected_title="true" show_icons="false" thumbs_effects="true" buttons_margin="15" buttons_align="center" slide_duration="1000" slide_easing="easeOutQuart" arrow_duration="800" arrow_easing="easeOutQuart" video_width="500" video_height="290" iframe_width="600" iframe_height="430" exclude_products="" orderby="date" order="DESC" shelf_space="medium" skin="skin03" categories="childrens-lit-edited" post_type="bookshelf"]
Posted on 1 Comment

Self-Editing Tips: Use Ctrl + H to Edit Your Writing

Close up black and white photograph of the keys on a typewriter.

MS Keyboard Shortcuts Are Gold to Edit Your Writing

If you use MS Word on a regular basis to write and edit, you probably already know about the most common keyboard shortcuts. (If you’re not familiar with the long list of Windows keyboard shortcuts out there, check them out now!) In particular, there are several wonderful, useful keyboard shortcuts that will help you level up when you edit your writing.  They open for you a world of time-saving tricks.

Admittedly, my favorite keyboard shortcut is Ctrl + Z, which is “undo.” I frequently make mistakes and immediately want to revert the text or document back to the way it was.

(If only there was an Undo button for life, right? But I’ll settle for Ctrl + Z.)

When you’re an author putting your early-draft manuscript through rounds of self-editing (using this checklist can help!), you can save valuable time and perhaps lower the costs of your professional editing by using a few simple tricks that are built into MS Word.

This article will help you navigate and learn to use one of the most helpful, time-saving keyboard shortcuts available when editing your writing: “Ctrl + H” or “Find/Replace All.” 

"Replace All" Is Misleading: You Need "More"

It’s not as simple as it first sounds. You may hear “Replace All” and think, “Oh! That’s an easy way to edit my writing. I can fix every mistake of the same kind all at once.”

Well, yes, but even more so: no. When you’re using the function for Ctrl + H, there are a few advanced settings to be aware of, and there are a few tricks to make your search-and-find editing sessions easier.

Finding "More"

When you hold the “Ctrl” key while tapping the “H” key, the Find/Replace All pop-up box should open. Select the “More” button in the lower left-hand corner to see the Advanced Menu options. Using these options will level up your results when editing your writing.

Find and Replace All box in MS Word with the "More" button for Advanced menu options circled in red. Helpful for writers editing their own writing.
Click "More" to open the Advanced Settings menu.

Accidentally Replacing Parts of Words

For example, let’s say that while editing your writing, you noticed that you inconsistently used the number “2” and spelled out “two” throughout your manuscript. Now you want to quickly edit and correct all the numbers, according to the Chicago style standards, to ready it for publication. And you want an easy way to fix your number errors.

However, if you simply Find/Replace All appearances of 2 with two at once, without reviewing the advanced settings, you could have problems.

What happens if you use Find/Replace All universally? Well, when that 2 is part of a larger number, like 22 or 287, you’ll end up only replacing the appropriate numeral, creating new errors like twotwo and two87. Neither of these is what you want.

I’ve seen a popular post online (and you might have too) that tells the story of a British publisher that used Find/Replace All with an American book, specifically replacing pants with trousers. Then, the book went to print with occutrousers in the text because the editor did not adjust the advanced settings. Whoops.

How to Search for Whole Words Only

Search for whole words only when editing your writing to ensure greater accuracy
Search for whole words only when editing your writing to ensure greater accuracy.

When you open the Advanced Menu options by clicking on “More,” you’ll see a series of tic boxes in an extended menu. 

The second option down in the left-hand column reads, “Find whole words only.” Select this box to search only for whole words in your Find/Replace all edits. 

To continue our previous example, if you select this option, then search for 2, you’ll see it only brings up instances of 2 that are not a part of larger numbers like 22 or 287

You can see how this would help if you’re searching for pants as an individual/whole world; in that case, no occutrousers

Pro editing tip: 

Using “find whole words only” comes in hand when editing your writing for the word “OK.” People commonly spell/punctuate/capitalize this inconsistently (OK, okay, Ok, Ohkay, O.K.), but the series of letters can be part of many other words.

So if you’re doing a search for ok, it’s appropriate to check the back for “whole words only,” to make sure you don’t pull up words like spoke or stroke or book, look, or took

How many ways have you seen to spell OK? What’s your default?  

Fun fact: CMOS prefers OK but defers to author preference as long as there’s consistency. APA Style does not state a preference, as OK is simply seen as nonacademic and inappropriate.

Personally, I prefer okay, but oh well.

Accidentally Missing Capitalization Errors

Capitalization can be a real pain when you’re searching for words that might be capitalized inconsistently, like asap and X-ray

Again, we have our common offender, OK.

OK is a very commonly used word at the beginning of sentences as well as throughout. So capitalization for it might be all over the place in your manuscript.

Make sure to always check the case if you’re making an edit to a word that the Merriam-Webster dictionary advises specific capitalization. For example, if you want to ensure that any instances of nasa or Nasa become NASA. 

But, in the case of OK, if you know you consistently wrote okay throughout and you want to edit them to OK, do two searches–for okay and Okay--with the case sensitive option turned on to ensure you replace them all with OK.

How to "Match Case" to Self-Edit Your Writing

When you open the Advanced Menu options in the Find/Replace box, you’ll see a tic box next to “Match case.” Check off this box to search for the same capitalization as what you enter in “Find what.” 

Match case to Replace all of the same capitalization when editing your writing
Match case to Replace all of the same capitalization when editing your writing.
Use matchcase and find whole words combined to replace specific words when editing your writing.

Edit Your Writing with A Self-Editing Exercise

Want to practice using these advanced editing options to edit your writing? One good way is to do a thorough round of edits focusing on some of your most overused, easily cut verbiage. 

Not that anything you wrote “must go”…but…probably. 

Two of these overused words/phrases that I am particularly sensitive to are just and a lot of

*sigh*

I challenge you, specifically, to perform advanced searches on your manuscript for these two top offenders. Some people overuse these more than others. *wink* 

To take this exercise even further and give a thorough edit to your writing, check out our blog and the linked video on 29 words you can cut from your novel.

Good luck and happy writing! 

Your Professional Editor

A round of self-editing for your writing is essential, but when you’re ready for a professional touch, contact SRD Editing Services. 

Posted on 1 Comment

Creative Thinking & Writer’s Block: Oblique Strategies App

writers-block-app

There’s a bunch of apps out there to help you be a better writer. If you’re struggling with writer’s block, you may want to try a few to see what works for you.

May I recommend Oblique Strategies? It’s available for both Android (here) and Apple (here)

This sleek, straightforward app is designed to give you simple food for thought and a new perspective. At times, the quirky or out-of-the-box solutions might help you work through the peskiness of writer’s block. Maybe you’re struggling against a thorny plot point, maybe it’s some problem of character motivation, maybe it’s the general inability to string words together cohesively.

The Oblique Strategies app sort of reminds me of a Magic 8 ball. If you become frustrated, stop and open the app. Think of a question that encapsulates your current struggle. Swipe to see what happens.

As you scroll, (you can go either left or right), the randomized cards present you with single sentences that may come in from an angle you weren’t expecting.

I suggest you cut yourself off after three swipes. Of course, the first solutions might not be realistic for whatever reason. So try again, a couple of times. Then, stop yourself. It’s too easy to keep chasing the suggestion you want to hear instead of pushing yourself to try something new. After three swipes, choose one of the ideas or strategies presented to you and execute it to see how it affects your writer’s block. 

You may not prefer or like or have ever done the suggestions before, but that’s the idea! Push yourself from your comfort zone, because your comfort zone has given you this writer’s block. Get out from under it. Don’t be blocked. A different perspective or a new strategy is often the only way to find a solution.

Developmental Editing/Book Coaching to Break out of Writer’s Block

If you regularly struggle with writer’s block and are looking for a long-term solution, working with an SRD Editing Services editor for a developmental edit or book coaching might be just the thing. 

Posted on

Self-editing Checklist for Authors

A pink piece of paper demonstrating a self-editing checklist for authors

Congratulations! You’ve finished the initial drafts of your manuscript. Maybe you even went through developmental edits or critique partners already. Now, you think you’re ready for content editing or line editingNot so fast. You want everything to be as clean as possible—you want to save yourself the time and money of making editors do extra work. Here’s a handy self-editing checklist you can use to guide your final steps before you send it off to be marked up.

A Word on Style Guides:

While the big five publishers typically follow the guidelines in the Chicago Manual of Style, most independent book publishers have an in-house guide; as a self-published writer, the rules of style are yours to choose from.

Be prepared to discuss with your editor some specifics like Oxford comma, when to use italics, and whether you prefer “ok” or “okay” or “OK” or “O.K.”, “T-shirt” or “tee shirt” or “t-shirt”.

My advice: Pick one and use it consistently during your self-edit. If you and the editor decide to make a change later, it will be a smoother process.

Self-Editing Checklist for Writers

  • Chapter & section titles
  • Fact checking
  • Character & setting consistency
  • Punctuation consistency
  • Order of events /continuity
  • Basic font/formatting

Let’s go through these in some more detail. Edit your writing with these in mind, and you’ll feel good passing it on to beta readers or your editor.

Editing Chapter & Section Titles

Every chapter should be marked. You might not title them, but they need to at least have numbers. Every chapter should start on a new page.

Create a new page by inserting a page break at the end of the previous chapter. Click your cursor after your last line of text, hit Ctrl + Enter (or Command+Enter on a Mac) and voila! Your cursor will be at the top of the next page. Now use your “Delete” key to move the next chapter title into place.

According to Chicago style, spell out the words (“two” and “twenty”) rather than using Arabic or Roman numerals. My rule of thumb is to be consistent. I don’t care if you like it spelled out or use numbers — just pick one and go through all your chapters and make them the same.

self-editing checklist for writers, authors, and poets
It will all build on itself. Trust the self-editing and professional editing process …

Lastly, you don’t need to center the chapter title. You can if you want, but your designer will likely remove it anyway.

Now, cross this off your self-editing checklist. Well done. 

Editing for Facts

Fact: it’s super-easy to Google a business, brand, or person’s name and make sure it’s spelled, capitalized, and punctuated correctly. You can do this simple research yourself or you can pay someone else to do it, but it should be done.

Pop quiz: Is it “Pop-Tart” or “PopTarts” or “Pop Tarts”? What about “cleanex”? Is that correct? Does Frederick Douglas’ last name have two “s”es?

Answers: Pop-Tarts, Kleenex, and yes.

I will never forget being younger and reading a book from a renowned author, and noticing that the spelling of “Arrowsmith” appeared in the printed book. This was in pre-Google days but still… It haunts me.

Fact: it’s pretty easy to check the history of most things, and if you’re writing a historical novel, you must.

Don’t have your characters using technology that is invented after their time, dressing in clothing that doesn’t match the period, or unaware of information that was common knowledge in their day.

I once edited a novel set in the 1800s where the richest character showed off how rich he was because he was the only guy in town with a certain type of car… or any car for that matter, because they hadn’t been invented yet.

Fact: it’s a little harder to check the science on something if you’re a sci-fi writer, but you’d better do it. Otherwise, science lovers won’t want to read your stuff. Take the time to learn the basics of the science you’re writing about. You don’t have to get your PhD, but you do have to know at least enough to pass a 101 class.

This self-editing checklist item can take a bit more time, but it will be worth it in the end. 

Editing for Character & Setting Consistency

improve-writing-process
Your reader will go down a straight path from beginning to end. Take a look at it the way they do.

I’m assuming you didn’t sit to write the whole novel at once. So I’ll give you leniency and predict that some details probably changed. Maybe a character starts off brunette and ends up with black hair. Maybe the house starts off blue but ends up yellow. Maybe the scene starts off midday and suddenly shifts to sunset.

Inconsistencies happen.

If you’re a planner, you might have made a whole character description list and maps and who knows what else. They might come in handy at this point, but if you didn’t make one already, there’s no time like the present.

Start at the beginning. When a new character or setting is introduced, make a note of what details you included, including how you spelled the name that first time. If you spelled it wrong the first time, correct it and move on. But otherwise, I want you to read through and make sure every other use of that character’s name is spelled the same way as the first use.

Yes. This happens more than you would think. Writers change the spelling of character names. Sometimes the name itself will change or the character suddenly has a nickname—it happens all the time.

Your reader (and editor) will think: How was I supposed to know Kate and Katie were the same person?

Some writers might find it helpful to note the time of day or location at the beginning of each scene, then read through the entire scene and confirm consistency. After you know a certain scene, chapter, or section is consistent, you can remove the notes about it.

The trick is: Read through and note details that arise every time the character appears. Then, the next time the character is in the scene, check your notes. Make sure distinguishing features or idiomatic expressions remain true to the character you’ve already introduced.

Give this self-editing checklist item several rounds and perhaps break it into sub-list items if that is the right process for you. 

For consistency with self-editing numbers, take a look at this detailed blog about self-editing numbers in Chicago Manual of Style

Punctuation Consistency

This is another thing you can pay for if you want to, but with a little elbow grease, you can shape this up pretty good yourself. So roll up your sleeves and get to work.

The three biggest offenders here are probably dashes ( – vs. — ), use of parentheses, and punctuation in time.

Dashes — first: they’re not hyphens. Hyphens join two words to make a new one and don’t have a space on either side. There are two types of dashes (but this blog is long enough, no?), and my general rule is: if you want to make the reader follow you across a little “pause” or “jump” then put a space for them to jump over, two short dashes to land on — like this — and a space to let them jump back into the main sentence.

Just make all your dashes between words consistent.

Parentheses: if you open it, you must close it. Don’t leave any parenthesis hanging. If you start it, finish it too.

Don’t leave a random parenthesis hanging at the end of a sentence or paragraph if there wasn’t one earlier in the sentence or paragraph. It’s technically just a typo, but these things happen. And your reader will go back and look for the other one and lose their train of thought. You never want the reader to lose their train of thought.

self-edit, consistency, punctuation help
Make your message clear, and it will be timeless.

Punctuation in Time: I may be going against Chicago style here but I’ll say it anyway—minimize your use of colons, and use periods to your advantage. I suggest that if you’re mentioning an exact on-the-hour time, go ahead use the Arabic numeral without a :00 after it. If you’re using “a.m.” and “p.m.”, periods help make it clearer and are preferred by CMoS.

Don’t capitalize “AM” or “PM”, and I suggest that you never use “o’clock”, unless it’s accurate to the historical period or character’s voice. CMoS does allow for “o’clock.” 

For more about consistency with semicolons take a look at our blog with easy semicolon rules to help you check this off your self-editing checklist. 

Editing for Event Continuity

We’d all like to think that our scenes don’t contain any holes. But, we’re wrong. 

Continuity is easy to mess up—and even after you’ve edited for character and setting consistency, there’s one more type of consistency you should check for. 

Re-read scenes with an eye for consistency of smaller actions inside each event. Do your characters repeat actions or lines of dialogue? Are there gaps between actions in the scene—for example, does a character take off his jacket, but then in a couple lines, it’s back on again? 

This round of your consistency edits—specifically for continuity—is where you’re checking for internal consistency within scenes. Some editors will begin at the end of the book and work their way backward chapter by chapter, to make sure that the continuity within each scene is solid.  

As your self-editing checklist is getting shorter, your manuscript is getting better. Keep going! 

Editing for Basic Formatting

OK, you’re reaching the conclusion. You’ve edited and re-edited and revised and checked over everything. You might have even reached a point where you feel like your eyes will cross if you have to read it again. 

This round of editing doesn’t really require reading. Just attention to detail. 

The long and complicated explanation regarding formatting is that—oh boy—it largely depends on how you plan to publish. If you’re self-publishing, you’ll be sending your Word document to a professional designer for the internal formatting for your printed book. 

Don’t argue, don’t think you can cut corners or save yourself money by “formatting” your printed book yourself. You’ve put so much hard work into your manuscript, and if you’re going to print physical copies, don’t sell yourself short. Hire a pro. That being said, you will want to do some basic formatting before you send it to a designer. 

If you are planning to self-publish an ebook, there are specific formatting guidelines you will need to follow. But again, you’ll need to do some basics before you send it to an editor or your publishing team, or even before you convert the document into the appropriate file format. You can do this yourself, if you want to take the time to learn, or you can hire a pro. But either way, do the basic formatting. 

So what do I mean by “basic formatting”? 

Simple: 

  1. Make sure that all the body copy is in the same font and same spacing. Select all text, and make the font, font size, and paragraph spacing uniform. Don’t try to manipulate this stuff so that the MS Word document “looks right.” It’s more important to communicate to the designer how you want it to look than it is to make it look that way. 
  2. Make sure each chapter starts on a new page (see earlier checklist item). If you want to be really fancy, make sure that each chapter title is in bold, to identify it at a glance.
  3. Search the document for any double spaces. Remove them. No double spaces at the beginning of a new sentence. No double spaces at all. 
  4.  Put in your “front matter.” This includes the Title page, acknowledgments page, and copyright page. You *can* include a Table of Contents page, but do NOT (repeat: do NOT) bother to include the page numbers here. The page numbers will change throughout the formatting, and this page is best finalized as one of the last things. 

So four basic things that might take you an hour or so to complete and officially cross off your self-editing checklist. And if you don’t know how—ask! Whether you have an editor you can consult with, or if you check out some helpful tutorials on YouTube or Skillshare to improve your MS Word skills, there are plenty of places for you to find out what you need to know to make these simple formatting at home in your manuscript. 

Ebook formatting from SRD Editing Services | literary editor fiction & nonfiction | Orlando, FL

So that’s it! I know I said this wasn’t going to be a comprehensive self-editing checklist—and trust me, it isn’t—but hopefully, we’ve struck that balance between “that’s enough” and “too much”. This is definitely editing that most writers can manage themselves—no special training or extensive skills necessary—however, hopefully it’s not too advanced that you’ve gone cross-eyed. 

My Favorite Editing Shortcuts

Editing can be a long process. Here’s a few of my favorite shortcuts. Of course, these are for a PC, but I think on a Mac you just use the “Command” key instead of the Ctrl key.

  • Ctrl + A for select all
  • Ctrl + F to find
  • Ctrl + K to find and replace
  • Ctrl + Z for undo

You can also check out this blog about how to use CTRL + H when writing and as an addition to your self-editing checklist. 

Happy writing!

Let's Talk About Your Manuscript ...

Posted on

How to Outline Your Novel or Nonfiction Book

Woman editing a stack of papers by hand to demonstrate how to outline your novel or nonfiction book.

In my years as a developmental editor, ghostwriter, and book reviewer, I’ve come across a few tricks to breaking down a good story, and a few tips for assembling one. Maybe you’ve been told before how to outline your novel or nonfiction book, but hopefully this blog will have some new information for you. 

In the discussion about different types of writers — “planners” vs. “pantsers” — I tend to come down closer on the side of “planner.” I look at it like having a road map that helps you know what direction you’re heading, but it doesn’t mean you can’t take detours or stops or double-back along the way. 

Writing is a journey, and here’s a few tips to help you get through it.

About Outline "Rules"

Many writers say to begin a plot or nonfiction book with an outline. You’ve probably done different kinds of outlines repeatedly since the seventh grade.

I wholeheartedly agree that you should outline your novel or nonfiction book, except two things:

First: You’re not in school, so don’t think your outline will be graded. It’s for you, to organize your thoughts. So don’t use Roman numerals or complicated tiered systems if they don’t work for you. Regular ol’ bullet points work just fine.

Second: Take a step back to something even more basic than the outline. First, take three blank pages and plot out your book’s beginning, then the end, and then figure out the middle. One page for each.

First Tip to Outline Your Novel or Nonfiction Book: Begin at the Beginning

The beginning is often the easiest to write. You have figured out where to start; you have a lot of information and world building and context to put in.

Limit yourself to only one page to summarize the most important points for the beginning of your outline. You will expand on it later. No doubt.

Answer Me These Questions Three

The beginning of your story should answer three questions, so you want to address them on the first page, and use them to build the first section of your outline.

  1. What’s the story about?
  2. What does the reader need to know to understand it?
  3. How much does the reader know already?

Your first two chapters should set up the context. Maybe a preface or introduction if you can squeeze it in. But really, you don’t have long to get the reader invested. When you want to outline your novel, include specific points and details about how and where you will hit these points in the narrative. 

Assume your back cover copy has gotten the reader to open to page 1. They’re primed for you to “wow” them. Use a barbed hook to pull them along through the opening pages. Show them that they made the right decision to crack the cover — because you’ve got something to say, you’ve got a story to tell, and you’re talking straight to them.

Getting them hooked is one thing. Interested is another. But really getting the reader to the point where they can say to someone “I’ve read a couple chapters, and I really like it so far” — that’s the first solid milestone.

Give Readers what They Need & Build to Outline Your Novel or Nonfiction

You want your book’s readers to understand the context for the book right away. Weigh in the first page they should clearly know the main theme of your book. Not the thesis statement of it, but what’s at the heart. They should be able to immediately see themselves living inside it for hours.

You want readers to figure out quickly that they have some idea of what’s going on. Don’t overload the beginning, keep them walking through the introduction to the topic or the characters’ world, and give them a few pages to put together familiar pieces. Connect with things similar to what readers have heard or seen before.

The beginning of your book can namedrop or allude to references, and it should convince the reader you know what you’re talking about. Both for fiction and nonfiction.

Keep the Reader Guessing

Although it will be tempting at the beginning, don’t reveal every secret. Don’t list off everything that makes your book different. Let your readers discover why your book is different and tell you when they’ve finished it. Instead, focus on letting them see how the knowledge they bring from their experience as a reader is going to pay off for them in your book.

Then, when they think they have a handle on the topic at hand and the world you’ve created for your characters, drop the first bomb on them. Shatter something the reader took for granted, something they thought they knew and understood. Put something familiar in a new light, and you’ll get them passed the beginning of the book and into its middle.

Second Tip to Outline Your Novel or Nonfiction Book: When You Get to the End, Stop

Next in the outline of your novel or nonfiction book, consider the end of your book. Your ending has to stick, if you want anyone to leave an online review or tell their friends about you. Too often I see writers really dig into the beginning and lose steam by the end. So, outline your book’s ending before its middle.

Use one of your three sheets of paper to brainstorm the answers to the three following questions. 

  1. Where does the reader end up?
  2. How do they feel?
  3. What should they do next?

If you plot the end of your book with clear intentions of the results you’re aiming for, you are more likely to hit them. Consider both issues of plot structure and resolution for character arcs, as well as the emotional ripples you’ll be sending through your readers’ souls. Do you want readers to be better prepared for something in the world? Do you want them to have an emotional reaction? 

Again, considering how your book’s outline functions like a road map, this is your general idea of the destination you want to reach and the welcome you expect on your arrival. 

Outline Your Novel to Avoid "The Curse of the Dragging Middle"

The middle of your book will likely comprise approximately 40 to 60% of your overall content, depending on how thorough you are with your first and final sections. And, I would reckon that “somewhere in the middle” is where 40 to 60% of readership lose interest.  

This is the “meat” in burger that is your book. So your outline can’t “yada yada” past this important section. It may be tempting to rush it, but take as much time considering how to avoid making your middle “drag” as you did with brainstorming how to engage the reader in the beginning. 

Avoid a sagging middle section in your book by addressing four questions:

  1. How do I get the reader from where they are to where I want them to go?
  2. What are the 3 most important things I have to tell them (in 2 sentences each)?
  3. What order should I release this important information?
  4. How can I capture readers’ hearts and minds?

Don’t underestimate the value of having a road map to get you through this important section. If you want people to finish your book, think ahead about the course you’ll guide them along. 

Of course, this first outline isn’t a hard-and-fast rule, and the draft will change. But you’ll know where you’re starting, where you want to end up, and have a vague way how to get there if you outline your novel or nonfiction book.

Ready to talk about how to outline your novel, nonfiction book, or other manuscript?

Posted on 1 Comment

Ad Copy & Poetry: Kissing Cousins

Depictions of billboards at a busy intersection to relate ad copy and poetry

In writing for businesses, I frequently hear marketing directors/executives/creative team leaders say something to the effect of “Make every word count. We want them to feel, not think. Lead their thoughts with your words.” This is at the heart of ad copy. 

It’s poetry, commercialized. (Oh, and dumbed down to the LCD). People marketing to you expect to you read, feel, and react at about the level of a thirteen year old. Don’t think they respect your intelligence. They think the buyer is “smart” and “savvy”, not knowledgeable.

In my most humblest of opinions.

So, what can we learn here, about this crucial fact of both genres of perhaps the least-read words on the planet? (Think about it: lower but more dedicated readership numbers for poetry vs. a widespread yet fickle audience in advertising.)

“Impact” and “retention” are the names of the games in both.

Impact is Instant in both Ad Copy & Poetry

Whether it’s poetry or sales copy, you need to land with an immediate impact. No, not immediate. Instant. Where in a novel, a reader may give you a whole page to sufficiently hook them, and in a short story the reader might allow you at least a paragraph to breathe magic into words, readers of ad copy and poetry give you about three words.

Three. Friggin. Words.

In no time flat, you have to trigger the reader into some kind of reaction. Get them through to the end of the sentence. That’s your first goal.

All the advice you’ve heard about eliminating adverbs? Now is the time.

You will find a difference in the use of adjectives in poetry vs. ads though. In poetry, you want sensory images and specifics that come with detailed nouns. In ad copy, adjectives can be useful to trigger emotions. You want the reader to be able to picture the product in their hand and their life.

With that being said, some of the same rules apply. Alliteration. Cacophony. The old school literary devices that you “need to know“, all show up in poetry and ad copy.

Retention Depends on Goals

Consider your end goal when writing. 

If you want readers to feel, perhaps reflect and think very deeply, then you’re writing poetry, and you probably can keep someone who reads the first line engaged enough to read the first stanza. From there, it’s up to you to keep them engaged in every line.

If you want the reader to feel something within three words and take action by the end of a single sentence, then you’re in ad-copy-land.

For either type of writing, thinking about the goal of your words will lead to retention of your readers. If your goal is to entertain and inspire, and you focus your words on that, not only can you engage the reader for the entire poem or advertisement, but you have a higher chance of grabbing their attention in future encounters.

Ad Copy & Poetry: Concise. Clear. Compelling.

It’s what both ad copy writing and poetry must be.

Need editing for poetry or ad copy?

Posted on Leave a comment

Tips for Consistent Quality Writing

tips-quality-writing

There’s a problem with doing something well: Once is rarely enough. When you do something (like producing quality writing) well, two things can happen:

  1. Other people begin to expect more of you, and
  2. You begin to expect more of yourself

For a writer, this can be great. A well-done piece deserves the admiration it receives, and you should be proud when an article, poem, essay, story, or book comes together.

But unless you’re one among the rare breed of author — and I mean really, really rare — who can launch a career from one great piece, a single successful publication will not a sustainable income make.

Setting Unreasonable Standards

So after your first great piece, you sit down to write the next one. Immediately the demon of comparison shows up on your shoulder.

What if it’s not as good as your first published thing? What if you don’t live up to the expectations for quality writing you’ve set for yourself?

On some level, you try to tell yourself, “Everything will be okay if it’s not ‘perfect.'”

So you let something slide. Relax a little on your vigilance to push the quality to its extreme.

But if your first high-quality product was noticed by the public, you can bet that any dip in quality will be noticed, too. You set a high standard that others now expect to see in your work, and when they don’t see it, they will let you know.

Setting Reasonable Writing Expectations

What’s the lesson here? How do you keep yourself from being caught in an endless loop of writing better and pushing yourself to the limit every time?

Well, you don’t.

Some people think they can avoid this challenge by settling for a lower quality piece and set low expectations at the beginning. But ask yourself: Why would you expect to get readers if you lower your standards?

Readers have fairly low tolerance for writers who treat them like fools. If you’re offering mediocre or low quality, they won’t be back for more.

With lower quality writing, you’re less likely to engage as many people to begin with or bring back the ones you engage with the first time.

So what to do?

Quality Writing Tip #1: Do your best.

One man’s trash is another’s treasure and all that. If your prose is clean and error free, and your plot is well structured with thought-out character arcs and a solid narrative, readers may forgive historical inaccuracies, use of clichés or bland characters and world building.

Do your best, and be prepared to hear that your best wasn’t “perfect.”

Present the reader with a polished package, and they may overlook some areas where it could be improved. Or, at least you’ll receive feedback on what to improve for your next piece.

Quality Writing Tip #2: Use feedback.

Don’t just “receive” feedback, use it.

If you received praise from readers, and you want to know why they thought your book was high quality — ask!

This might take the form of social media polls, reading your reviews and comment threads, or sending out reader copies  of your work and asking for specific advice.

Use what your readers say to recognize at least four things your readers generally agree was high quality about your writing or the book in general, and identify at two areas where you can push the quality to higher levels in the next poem or manuscript.

Quality Writing Tip #3: Look for quality to emulate.

Maybe you really admire colorful metaphors or quirky descriptions and world building. Maybe tight and minimal sentences are what you strive for.

Read books from some of the great writers in your genre or historical time period and pick out examples of what you think makes their writing great.

Work to structure your sentences the same way, use metaphors or descriptors similarly, or mimic the dialogue style that you find engaging. Whatever it is that you enjoy about reading their work, use as a model for your own craft.

Quality Writing Tip #4: Be patient. Quality takes time.

Be prepared to tackle your manuscript in multiple revision iterations.

Maybe one day, you revise the entire thing with a focus on word choice. Then, the next day, you do a read-through and edit to focus on historical accuracy. Stay focused on the areas you’ve marked for improvement and special attention. Be patient.

You might be midway through your outline and realize you need to do additional research or watch a movie that people recommended as a reference. Do it.

Don’t let the pressure to put out a follow up to your first well-received work push you to a hasty release of the next piece.

If you’re honestly working to improve, you must work as hard as you did the first time, so you can reach the level of quality you’ve already set for yourself. Then, push at least 25% past that. Work harder than you’ve ever worked before; the improvement will show.

Once you become recognized for your skill, enjoy it. But don’t stop.

No one wants to be a one-trick pony, and compromising on your writing quality ensures you will be.

Need Advice on Your Writing Quality?

Posted on

Eye Care for Writers

eye-care-writers

Working indoors, sitting and staring at a computer for many hours per day, is not what humans evolved for throughout history. But our big brains have led us here, and we’ve developed a society where some people have to look at screens for many hours per day, which requires eye care. 

Studies have shown, and it is well documented in the research, that a sedentary lifestyle, including working at a computer, can have serious physical effects and can be harmful to a person’s body and their physical health. 

In particular, if you are like mea writer or other professional who stares at a computer screen for hours on endyou need to know how this can affect your eyes.

Screens Kill Your Eyes

The results are in: The blue light from your computer, television, and mobile device screens is killing the cells in your eyes

Blue light contributes to macular degeneration, which means the breakdown of cells. Researchers also believe that an indoor lifestyle can contribute to a lack of vitamin D, another contributing factor to cellular degeneration

On top of this, people who naturally are a risk of lower levels of vitamin D, such as people with darker skin tones, who absorb less natural light, may be at a greater risk.

So if you have more melanin in your skin, work indoors, and stare at screens all day, you are at a higher risk of having your eyesight fail at a younger age. 

Blue-Light Filtering EyeGlasses—Do they help?

The results are still out: I don’t know. But, it seems, most of the results out there are anecdotal. Research isn’t required for eye wear, and the effect may very well be placebo. 

But, I was experiencing eye strain. Bluriness and bleariness. Difficulties reading and focusing after many hours on the screens. 

For months, I have kept the blue light filter mode set “On” at all times on my phone as basic, minimal eye care. This is part of the usual “night mode” settings that are often built inreducing the blue light after a certain time to help offset the upset that screentime can have on a person’s Circadian rhythm. But for me, I’ve just had the blue filter “On” on my phone for months anyhow. 

I think it helps. I have thought it helped for months. Often, once my eyes get tired on my computerwhich has a TV screen that doubles as my second monitorI’ll switch to my phone because it’s easier on my eyes. 

My First Pair of Blue-Light Filter Glasses

So for Christmas 2019, I was excited to receive a pair of ICU Blue Light eye glasses. They’re cute, and easy enough to wear. I’ve never worn glasses for reading or general eye problemonly the sunglasses I need to protect my vampirismso it’s a new experience for me to wear glasses indoors, as part of a normal eye care focused look.

Of course, the day after Christmas, it was back to work to push toward my end-of-the-year deadlines on projects, and I was doubly excited to give my new glasses a try. 

The results after only one day? The jury is still out. 

It was a long day10+ hours looking at the TV, computer, and phone screensbut I do feel like the eye strain was less. There is a noticeable difference, looking at the screens with the glasses on vs. looking at them with the glasses off. When the glasses are off, I can see how much more blue the screens look. It’s a similar effect that I’m used to when I turn the blue light filter on and off on my phone. So, it’s nice to see that I can at least see a difference immediately when putting on the glasses. Expect an update and full review after a few weeks of trying them out. 

Writers—Eye Care & Eye Strain Tips

  • Give your eyes a break. Schedule yourself to look away from your screen at regular intervals. Consider using the Pomodoro technique to organize your day, and during your 5 minute eye care breaks, spend your time looking at something without a screen.
  • Hang a landscape picture. Looking at a “distant object” gives your eyes a break. If you are near a window, great! Every 20 minutes or so, look out the window for 30 seconds at something far in the distance. If you don’t have a window, hang a picture or image of a landscape, with a house, waterfall, or other object in the distance. By gazing at the picture for 30 seconds or so every 20 minutes, you can give your eyes the same relaxation from staring at something up-close for so long.
  • Genetic eye enhancements. Consider getting upgrades for your eyes from GeneCo., the leading dystopian sci-fi corporation that can provide you with tireless, mechanical eyes that never need eye care. Embrace the future, chase the morning. 

Ready to discuss your manuscript?

Posted on 2 Comments

29 Words to Cut from Your Novel

tips-words-novel

Each writer lives in a special, unique mind. Each can combine words into glorious chains, never before seen by human eyes. Yet, each writer is also a flawed human, who is liable to trip on the same rubble on the path to beautiful writing as every other writer. (And no writer wants to hear that there are words to cut from their writing…)

Now, first drafts are supposed to be messy. Second drafts, less so. But it’s not easy to clean up the first draft to turn it into the second. Nor is it simple to revise the second draft into the third. As an editor, I know. I’ve been there with my own writing and the writing of others.

Behold! A Video to Help!

Vivien Reis is a writer, editor, and YouTuber

I’ve had this video saved for a couple of years, and I keep referencing it when editing my clients’ fiction and nonfiction. 

When I thought about writing a blog on the topic of editing for word choice, I started to make my own list of words to cut. Then I realized: Why re-invent the wheel? Vivian’s done a spectacular job to begin with.

Instructions for Word Choice Edits & Which Words to Cut

Generally, I suggest writers do at least one edit through their manuscript for “word choice.” As you watch this video, take notes on which of these writing habits you’ve gotten yourself into, which of these words to cut you think might show up in your work. 

Then, open your manuscript. Let’s take a look at the current status. 

Do an automated search for the first word or phrase in question. In MS Word and Google Docs, you can Find specific words or phrases by pressing CTRL + F (or Command + F on Mac) on your keyboard. When you have the results, record the number of appearances in your notes. 

Search for all the words or phrases, without making any changes. First, you’re just gathering info. 

Making Changes

First, let me say: I do not advise that you use “Find + Replace All”.

I advise that you find all instances of a word or phrase, then examine each to determine the necessary action.

Yes. It is tedious. I understand. I have two points for you to consider: 

  1. Writing the book was tedious. You did that though. You can do this part.
  2. If you don’t do it, you can always pay your editor to edit these out for you. 

The reason I do not advocate that you simply “delete all” uses of a word or phrase, is that it will cause additional unintended effects. Trust me. Especially if what you Find & Replace can sometimes appear as part of another word. 

Instead, work your way through the words and phrases you’d like to cut or revise, search for each individually, then examine each occurrence and make a decision about how to handle each of them.

Some Words to Cut / "Big Offenders"

In the video, Vivian points out some of the biggest offenders that have become littered across contemporary writing. These are words — typically, adverbs — that can easily be removed, and generally when they are, your sentence will lose no meaning. 

Here is my “Big Offenders” list of words to cut. I commonly see each of these, and spend a significant amount of time and energy making sure to reduce their use.

  • very
  • just
  • that
  • “began” or “started”
  • “a bit,” “a little,” “a lot,” and other imprecise amounts
  • “kinda,” “sorta,” “almost,” and other hedging words
In particular, I see “just” frequently used, so I’ll pick on it as an example. Unless you’re discussing the concept of “justice,” limit the use of “just.” Just is just one of those words that just works itself into a sentence just about anywhere.

Bonus Thoughts on Words to Cut from Your Writing

What else do I look at when editing? Two other things I notice frequently that I suggest you examine in your manuscript: 

  1. “Parallel action”: You can find this by searching for the use of ‘as’ in your writing. It usually appears in dialogue tags, as in: she said as she walked or he thought while grabbing his hat. Of course, you will need to use this sometimes. Remember to vary your sentence structure.
  2. “Extreme hyperbole”: Examine your fight or action scenes. Do your characters often overexert themselves? I often see phrasing like as hard as she could or with the last of his strength, only to have the character continue to escalate the action after that phrase. Consider how to build tension Show the exertion, rather than tell about it.

Maybe these aren’t words to “cut,” but they are certainly things you want to be mindful of. 

Ready to talk about editing?

Posted on Leave a comment

On Drinking, Smoking, & Drugs in Fiction

drink-drugs-fiction

Writers: Make sure if your fictional character is doing these things (drinking, smoking, and drugs) the reader has some sense of how it affects them. What’s their experience level with the substance? How do we know? Writing drinking and drugs in fiction can be a challenge, but with a little planning, you can get it right. 

A reader considers themselves to be “a good judge of character.” He or she also (generally) considers him/herself to be intelligent, not easily fooled,  and a good judge of truth.

You can be the judge of your readers’ ability to judge. I’m not here to judge that.

That being said, readers will notice when a writer mentions that a character is drinking, smoking, or doing drugs, but the character is not acting as if he or she is actually doing those things. If a character is supposed to be experienced at trying certain substances, but doesn’t use the terms that users use, or can’t explain how to ingest the drug and what effects to expect to a new user, the reader will call bullshit before the end of the page.

Writing Tip of the Day: Be Prepared to Go Gonzo, a la Hunter S. Thompson

If your characters are going to drink, prepare to make them drunk dial. If your characters are going to get stoned, prepare to make them lose track of large chunks of time and consume mass quantities of chips. … Jokes aside: your readers need to be able to see themselves in your characters. There needs to be the realism that alcohol, cigarettes, and drugs in fiction all have a relatable effect on the characters.

If your character has knocked back multiple double whiskeys and isn’t slurring his words or stumbling over his feet, the reader will need a reason to understand how your character has such a high tolerance.

If your character is sparking up a cigarette in every scene, then immediately snuffing it out in the next paragraph, your readers who smoke will roll their eyes. “At least, if you’re going to have the character light the damn thing, incorporate it for a reason.”

If your character is trying different types of drugs that give different highs, someone who has chased one type of high or another in real life will know. (Drugs in fiction can be especially questionable or unrealistic.)

It’s part of what made Thompson so powerful: he lived the experiences. He could write about the life he was living.

Not that I’m advocating any single one of you pick up any of the lifestyle choices (drinking, smoking, drugs, etc.) mentioned here: simply that, if they are not a part of your lifestyle, you will need to talk to people who have lived it, you will need to research what it is like to actually live the lifestyle in order to accurately relate it.

You have to be prepared to take it to a Thompson-esque level for your character when incorporating drinking and drugs in fiction. You have to be ready to make the character’s experience believable for the reader. Or else, by the time your character “sobers up,” your reader will already be home and in bed with another book.

Photo credit: Antoine Douglas at Concrete Rose Films.

Need an editor to take a magic carpet ride through the alcohol and drugs in your fiction manuscript?